Posted in Bar Soap DIY

DIY Lavender Soap

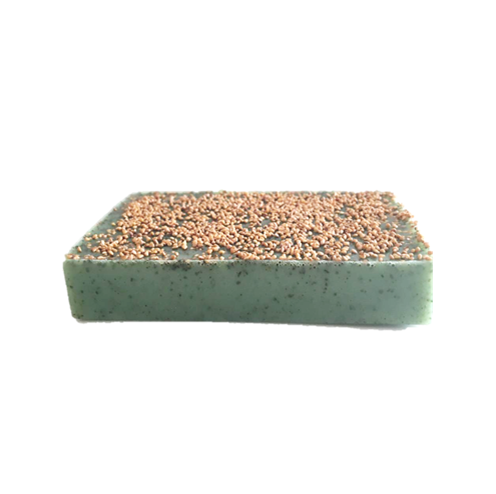
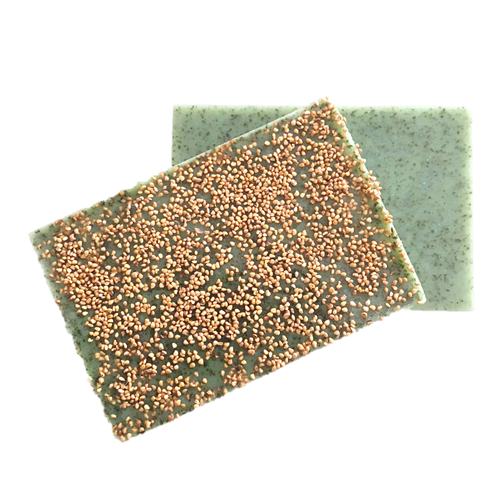
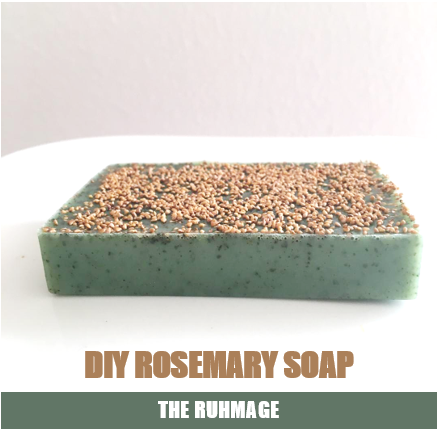
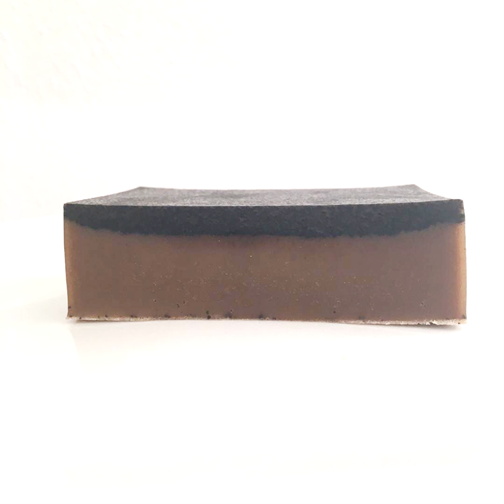
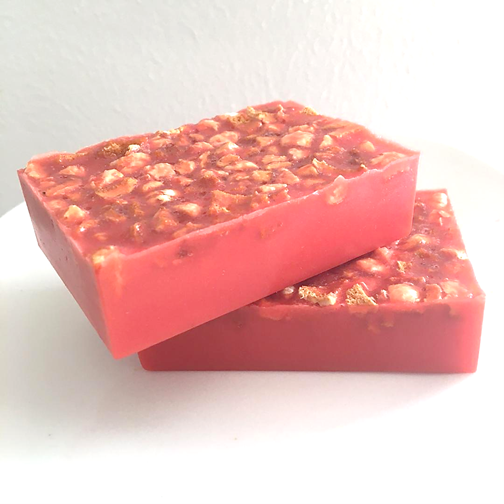
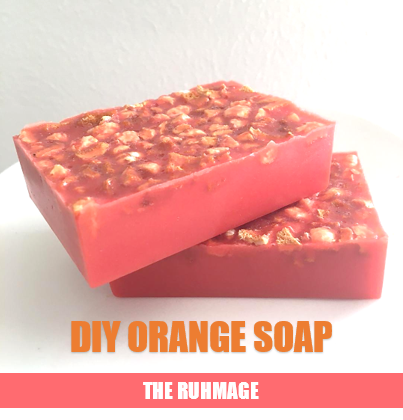
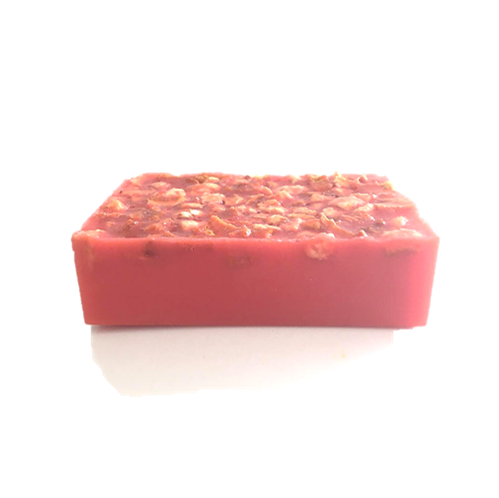
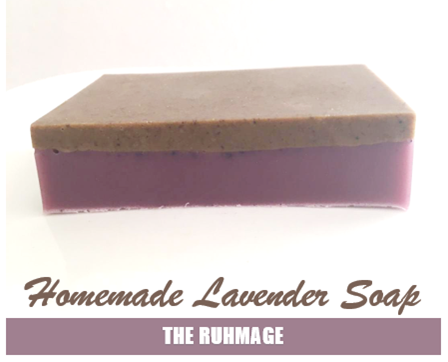
This homemade lavender soap is a wonder smelling exfoliating DIY lavender soap recipe! It is a two-toned soap with one side being all about the creamy lather and soapy fragrance while the other side is about the gentle exfoliation. The complete recipe and instructions are provided below. But, for now, let’s talk about the different options for making this DIY lavender soap recipe.

homemade lavender soap
Exfoliating DIY Soap

Fragrance

Since this is a homemade lavender soap recipe, you probably already guessed that lavender is the fragrance of interest. However, you may be surprised to know that both dried lavender buds and a wonderful smelling lavender essential oil is used to scent this DIY lavender soap recipe. Lavender is a calming essential oil that helps alleviate stress. You can also make the lavender lotion bar recipe with the lavender essential oil.

Soap

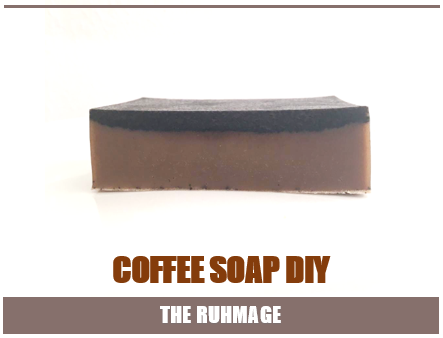
You can use whatever melt and pour soap base that you like. Just remember that a white soap base with give you a pastel version of whatever soap colorant you decide to use while the clear melt and pour soap bases will be more true to color. This DIY lavender soap recipe is made with a mixture of white soap base and clear brown soap base. So, with the clear brown soap base, the purple soap colorant turned out to be more true to color.

Colorant

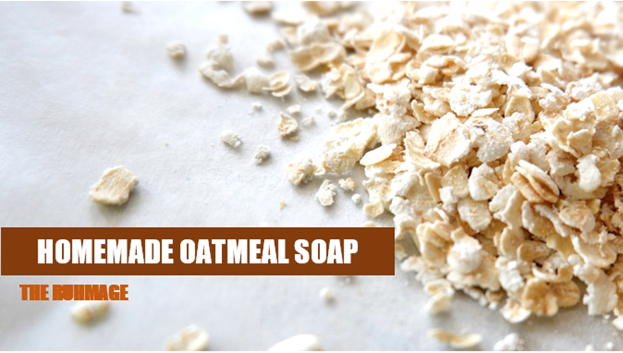
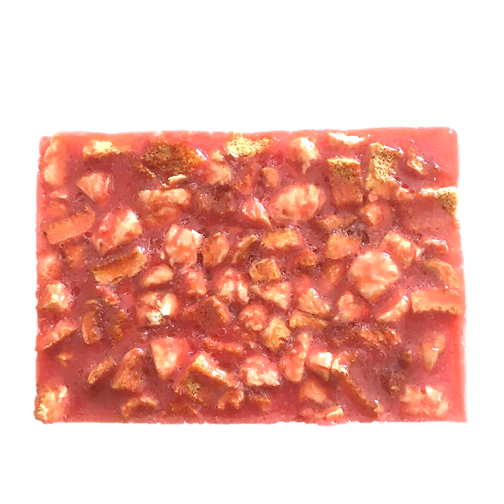
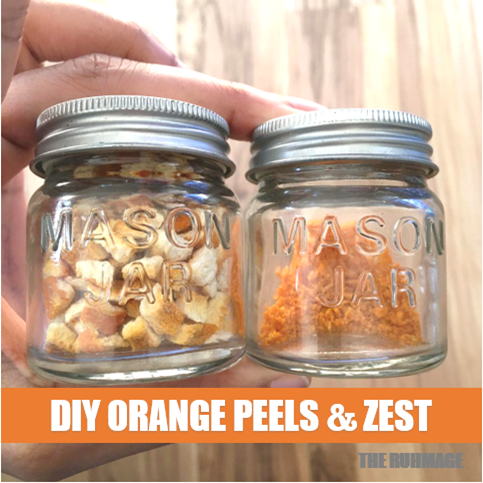
One of the colorants used for this two-toned DIY lavender soap recipe is a purple powdered pigment. The top brown part is an all natural color that results from the lavender powder. I used a coffee grinder to grind my own lavender buds so that it still has a little texture. However, you can find lavender powder online, but the powder may not be as textured for an exfoliating DIY soap.

Exfoliant

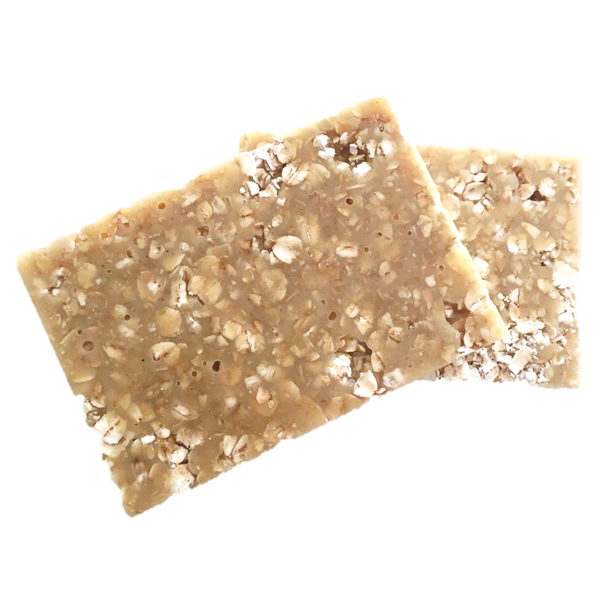
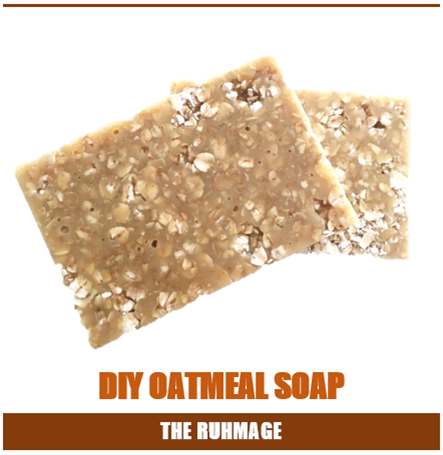
The ground lavender buds make a very gently exfoliant for the skin. It also slowly turns the soap a darker and darker tan color as the soap ages. The lavender buds are mostly for exfoliation, not for scenting this homemade lavender soap. The lavender buds can also be used in the lavender lotion bar recipe.

Yields: 1 DIY SOAP BAR

Supplies:

Ingredients:

Instructions

  1. Prepare your soap mold for pouring and drying the soap. If the mold needs to be transferred after you pour the soap, place rubber molds on something rigid to make transferring the mold easier.
  2. Next, cut and weigh the melt and pour soap base.
  3. Place 1 ounce of the white soap base in the microwave to melt.
  4. Then add about 1 tablespoon of ground lavender buds.
  5. Stir well and pour into the mold. Let dry completely before starting the next step.
  6. Now cut the remaining soap into small equal sized pieces in preparation for the microwave.
  7. Place the chunks of soap in the glass measuring cup and microwave the soap until melted. Microwave the soap in 30 – 40 second intervals to keep from boiling and drying out the soap.
  8. Stir the melted soap well making sure that all of the soap melts. Then add and stir in the colorant. (Some colorants must be mixed in at a relatively lower temperature to blend evenly. But with a two-toned soap, it should not make much of a difference.)
  9. Now add the lavender essential oil. Stir well.
  10. Lastly, pour the homemade lavender soap into the molds over the dried ground lavender but half.
  11. Let the soap mold sit until the bar becomes firm.
  12. Once your DIY lavender soap is cool and solid, you can unmold the soap and use it immediately.

Conclusion

This delightful smelling homemade lavender soap is all I have for for now! You know where to find more DIY Soap Bars for Beginners! For more help, read how to make homemade soap bars for beginners without lye. I hope you enjoy making and using this DIY lavender soap recipe soon!

Posted in Bar Soap DIY, DIY

DIY Rosemary Soap

This DIY rosemary soap is a homemade rosemary soap that has a wonderful clean scent. Even though rosemary has a distinct piney aroma, it pairs well with other soft and sweet fragrances that may make this DIY rosemary soap smell surprisingly good to you. It is a clean scented soap that has really grown on me. This DIY rosemary soap is becoming one of my favorite bars of soap!

Homemade Rosemary Soap

The step-by-step instructions for how to make rosemary soap is at the end. But, let’s briefly go over each ingredient to let you know some of your options.

Rosemary

As mentioned rosemary has a very distinct and earthy smell. However, it is a wonderful herb or essential oil to use. This DIY rosemary soap is made with a homemade rosemary powder. The powder adds color and mild exfoliation to this exfoliating DIY soap. However, rosemary essential oil is a very convenient alternative to the rosemary powder. Then too, it is typically one of the more affordable essential oils that can be used in various beneficial ways. If using the rosemary essential oil, you will likely only need a few drops of the oil.

Fragrance

The main fragrance of this DIY rosemary soap competes wonderfully with the frankincense essential oil and the Hungarian lavender essential oil. With the frankincense and lavender, this DIY rosemary soap turns out to be a very classy smelling bar of soap. However, it would also smell lovely with just the lavender and rosemary.

Soap

I was finishing up some melt and pour soap bases that I had, so this homemade rosemary soap is made with a white soap base and a clear brown soap base. Both are not necessary, but that is what I had to use. If you want to go with one of the other, just know that the white soap will result in a pastel version of whatever colorant you use and the brownish clear soap will be more true to color.

Colorant

Any soap colorant can be used to make this DIY Rosemary Soap. If you are using the rosemary powder to scent the soap, it may contribute more green tones, so keep this in mind when choosing a colorant.

Exfoliant

The exfoliant used is a strawberry seed exfoliant. They are tiny and smooth seeds, so the exfoliation feels wonderful and not too rough on your skin. However, as mentioned, the rosemary powder also acts like a very gently skin exfoliant as well.

DIY Rosemary Soap

Yields: 2 DIY Rosemary Soap Bars

Supplies:

Ingredients:

Instructions

  1. Start by preparing your soap mold. Place the mold on something rigid to make transferring the mold easier.
  2. Then cut and weigh the melt and pour soap base until you have enough soap.
  3. Next, cut the soap into small equal sized pieces in preparation for the microwave.
  4. Place the chunks of soap in the glass measuring cup and then microwave the soap until it melts. Microwave the soap in 30 – 40 second intervals.
  5. Stir the soap well making sure that all of the chunks melt.
  6. Now add the frankincense, lavender, and powdered rosemary or rosemary essential oil to the melted soap.
  7. Lastly, pour the soap into the molds and quickly sprinkle the top with strawberry seeds while the soap is still hot.
  8. Let the filled soap mold sit until the bars are firm.
  9. Once the bars are solid, you can unmold the soap and use this DIY Rosemary soap immediately.

Conclusion

That is all there is to learning how to make rosemary soap. I hope you did indeed learn something new and find something to do. There are more DIY soap bars for beginners recipes for you to try. For more ideas, read how to make homemade soap bars for beginners without lye. As always, I hope you enjoy making and using this DIY Rosemary Soap.

Posted in Bar Soap DIY, DIY

Coffee Soap DIY

This coffee soap DIY is sort of a new and improved version of the first DIY Coffee Soap. I liked the first coffee soap so much that I was eager to make another coffee melt and pour soap when that one ran out. While I really liked using the first coffee soap DIY, I did not like the unmolding process – as I used a plastic mold. So, for the second batch, I opted for a regular soap bar mold.

Well, to my surprise, this coffee soap DIY turned out beautifully. The dark solid coffee layer looks like a piece of leather. And the longer the soap sits, the soapy part of the soap “ages” like a fine wine. When showering, the leathery looking side is a perfectly textured exfoliating scrub while the soapy side provides a really nice lather and aroma.

Homemade Soap With Coffee Grounds

The soap recipe and ingredients are outlined at the bottom. But, for now, I will give you a brief blurb about the ingredients used for this coffee ground soap DIY.

Coffee

So, what kind of coffee do you use in a homemade soap with coffee grounds? I made my DIY coffee soap with used coffee ground. Ideally, you want the coffee grounds to be a dry as possible. So, take them out of the filter and do what you can to help them dry out. Sitting them on dry paper towels help.

Fragrance

The fragrance of this coffee soap DIY is a lovely fall scented soap. It is not just the smell of coffee, it is also the smell of syrup or vanilla (whichever you prefer). The scent of the cocoa butter lotion bar recipe would be go well with this DIY coffee soap.

Soap

The first DIY Coffee Soap was made with an all white soap base. The coffee soap shown here is made with a white soap and a clear brownish soap base. However, you can use one or the other. For and exfoliating DIY soap, I prefer the white base a little bit more than the clear brownish colored base because the soap bar turned out to be firmer.

Colorant

The colorant for the soap is all natural. As this wonderful smelling coffee soap DIY sits, the color darkens with time. So, there are no additional colorants needed for these DIY soap bars.

Exfoliant

The top view of this coffee soap DIY is very elegant looking. To me, it looks like a really nice piece of leather. It would be an excellent little gift for close friends or family members. You can see how nice the soap turns out as it ages in the video below. The bar shown in the video was made for me to use, not gift. Therefore, I was not concerned about the avoidable not-so pretty soap side.

To make the soap turn out pretty on both side, gently spray the back of the soap with rubbing alcohol to get rid of the tiny bubbles that often form. And, do not try to add more soap once it starts drying. The imperfections on the back (shown in the video) are the result of my trying to add more soap after it started drying and not spraying the back with alcohol to get rid of the tiny bubbles.

DIY Coffee Soap Melt and Pour

Yields: 2 DIY SOAP BARS

Supplies:

Ingredients:

Instructions:

  1. Prepare your soap mold. If you need to transfer the rubber mold elsewhere to dry, place the mold on something rigid to make transferring the mold easier.
  2. Now cut and weigh the melt and pour soap base until you have what you need.
  3. Then, cut the soap into small equal sized pieces to help the soap melt evenly in the microwave.
  4. Place the soap chunks in your pyrex measuring cup. Then microwave the soap until it melts. Microwave in 30 – 40 second intervals.
  5. Now add the coffee grounds to the melted soap and stir.
  6. Then, add and stir whatever fragrance oil or essential oil you are using to make the soap.
  7. Lastly, pour the soap into the molds and let the mold sit until the bars are firm.
  8. Once the bars are firm, you can unmold the soap and use the soap immediately.

Conclusion

That is all for now. You know where to find more DIY soap bars for beginners! For more soap making ideas and suggestions, read how to make homemade soap bars for beginners without lye. But, I hope you enjoy making and using this coffee soap DIY recipe.

Posted in Bar Soap DIY, DIY

DIY Oatmeal Soap

This DIY oatmeal soap is a wonderful smelling homemade oatmeal soap that is just in time for the cooler weather. This batch of oatmeal soap is not a DIY Oatmeal Soap For Eczema because it is scented with a delicious apple pie fragrance oil. Then too, it was made with a wonderful smelling maple brown sugar oatmeal. So, I am sure you can start to imagine how wonderful this DIY Oatmeal Soap smells! It is an easy homemade oatmeal soap that smells like fall at its best!

homemade oatmeal soap

The ingredients, supplies, and instructions are at the end of the page. However, let’s elaborate on some of your supply and ingredient options.

Oatmeal

The oatmeal used to make these oatmeal soap bars is an instant oatmeal. It happened to be a maple flavored instant oatmeal. However, an original oatmeal will work just as well too. The oatmeal added and stirred into the soap is first ground into a powder. So, to make this DIY oatmeal soap, you will need to grind some of the oatmeal in a coffee grinder or some sort of small food processor. You can also purchase ground oatmeal.

Fragrance

The fragrance is a combination of oatmeal, maple, and apple pie. Oatmeal has its own unique and pleasant aroma. Then, the maple syrup and brown sugar smell that was already in the oatmeal definitely provides a warm and cozy fall aroma for this DIY oatmeal soap. And then last, but not least, the apple pie fragrance oil makes you just want to brew a pot of coffee and eat the soap…but please do not eat the soap! : )

Soap

This DIY Oatmeal Soap recipe is formulated with two different melt and pour soap bases. However, you can certainly choose one or the other if you are just getting started with making DIY soap bars. It is made with a white soap base and a clear brown soap base. If you are choosing one over the other, the white soap base will look nicer with the ground oatmeal added.

Colorant

The earthy brown color of the soap is naturally colored with the ground oatmeal. Therefore, no colorants are used to make this delicious smelling DIY oatmeal soap.

Exfoliant

The gentle exfoliant used in this DIY exfoliating soap is oatmeal. Before pouring the soap mixture into molds, a thin layer of whole oats is added to each of the needed soap molds.

DIY Oatmeal Soap

Yields: 2 DIY SOAP BARS

Supplies:

Ingredients:

Instructions:

  1. Start by preparing your soap mold. Add a thin layer of the whole oats too the needed soap molds. If you are going to transfer the rubber mold elsewhere to dry, place the mold on something rigid to make the transfer easier.
  2. Now grind the oatmeal needed to added to the melted soap and set it aside.
  3. Next, cut and weigh the needed amount of your melt and pour soap base.
  4. Then, cut the soap into small chunks that are about the same size. (This will help the soap melt evenly in the microwave.)
  5. Place the small soap chunks in a glass microwave safe cup with a handle. Then put the soap in the microwave to melt in 30 – 40 second intervals until the soap is completely melted.
  6. Now add and stir the ground oatmeal into the melted soap.
  7. And lastly, add and stir whatever fragrance oil you are using into the soap.
  8. Pour the soap into the molds and let sit until the bars are firm.
  9. Once firm, you can unmold and use the soap immediately.

Conclusion

If you are here to learn something new or find something to do, this DIY exfoliating soap bar is a fun place to start! You can find more DIY soap bars for beginners. You can find more suggestions for how to make homemade soap bars for beginners without lye. I hope you enjoy making and using this DIY oatmeal soap.

Posted in Bar Soap DIY, DIY

DIY Orange Soap

These colorful DIY orange soap bars are delightfully scented orange peel soap bars. When wet, dried orange peels behave just like a sponge! They become just like a sponge that literally leaves your skin squeaky clean. I did not think that was possible, but my skin was literally squeaky after polishing it down with the orange peels on these DIY orange soap bars.

Citrus essential oils typically reduce the amount of lather in your soap, so it nice to have the “sponge” already attached to the DIY Orange Soap.

diy orange soap

The ingredients, supplies, and instructions are outlined specifically at the end. But for now, let’s elaborate a bit more on some of the options for making this homemade DIY orange soap.

The Oil

The soap bars are scented with an invigorating combination of essential oils including orange essential oil. If you are a complete beginner, be sure to use oils that are for soap making. Orange essential oil and vanilla essential oil are used to give a wonderful and elegant scent to these colorful DIY orange soap bars. You can add a little more essential oil for a more strongly scented soap or use a little less essential oil for a more delicately scented DIY orange soap. And, of course, for a 100% orange scented soap, you can just use the orange essential oil and skip the vanilla.

The Soap

The bars of soap are made from a combination of two melt and pour soap bases. A white soap base and a clear brown soap base is used to make the DIY orange soap as it appears in the pictures. However, you can certainly use one soap base or the other. If you use just a clear brown soap base, whatever color you add will be more vibrant and true to color. It will almost be like this coral colored DIY orange soap. A white soap base will give you a pastel version of whatever soap colorant you decide to use.

orange peel soap
Orange Peel Soap

The Colorant

You can use whatever soap colorant that you want in your DIY orange soap. This soap is not made with an orange colorant, it is made with a coral mica powder. However, you can certainly use a pretty natural orange colorant. If you are just trying to keep things simple, the white soap base can contrast nicely with the dried orange peels. Then, if you are adding vanilla essential oil, the white soap base will become more off-white or beige depending on how much vanilla essential oil you add.

DIY Orange Soap

The Exfoliant

For a gently exfoliating soap, you can add orange peels. You can make and add your own DIY Orange Peels. Or you can just sprinkle a little DIY Orange Zest for a little more color and natural orange fragrance. So, let’s get to the recipe.

DIY Soap Bars

Supplies:

Ingredients:

Instructions:

  1. Start by preparing your rubber soap mold. If you need to transfer the soap after pouring, place the rubber mold on a cookie sheet or on something rigid.
  2. Continue by cutting the soap into equal sized cubes.
  3. Place the soap on the scale to weigh the amount needed.
  4. Once you get the soap needed, place it in the Pyrex glass.
  5. Put the glass of soap in the microwave for about 45 seconds. Stir.
  6. Microwave again until all of the soap pieces melt.
  7. Remove from the microwave.
  8. Stir and then add the essential oil(s) and colorant.
  9. Now carefully, but quickly pour the soap into the mold dividing the soap equally between the molds.
  10. Then sprinkle each bar with about a tablespoon of dried orange peels.
  11. Let these DIY bar soaps sit in a cool room until solid.
  12. When the DIY orange soap bars are solid, you can unmold the soap bars & use them right away.

Conclusion

The soap bars will harden relatively quickly. It really depends on how hot the soap is when you are pouring it and the temperature of your room. You can make more DIY soap bars for beginners. For more help, read how to make homemade soap bars for beginners without lye. That is all for now! I hope you enjoy making and using this DIY orange soap or orange peel soap.

Posted in Bar Soap DIY, DIY

DIY Flower Soap

This wonderful smelling DIY flower soap recipe was made weeks ago! Well, I have definitely found something to do and I am definitely learning something new. But, I am behind on sharing my projects with you as I “learn something new” each day. Since summer is almost over, I thought I had better share this DIY flower soap with you before rolling out some more fun fall DIY soap fragrances.

DIY Soap Making Perks

The beautiful thing about making your own soap is that you can add whatever ingredients you want to the melt and pour soap base. You can make the soap any cute and fun shape for yourself, your kids or to share with your family and friends. Then too, you can add your own essential oil to make the DIY soap an even better antibacterial hand soap or deep cleansing body soap. Nevertheless, a wonderful smelling fragrance oil can be used instead of essential oil.

diy flower soap

One of my favorite things to do with DIY soap is add different exfoliants like ground loofah or my latest addition coffee grounds! Many people add wonderful smelling rose petals or lavender buds. However, for a deep cleaning detoxifying soap you can add charcoal. If you are not using charcoal, you can add your own pretty soap colorants. And lastly, you can use whatever DIY Flower Soap Mold(s) that you want.

You can make your DIY flower soap any shape, color, or scent you like! But, here are the basic details for making this DIY flower soap.

Fragrance

The amount of fragrance oil or essential oil used will depend on the oil and how strong you want the soap to smell. Remember you can always add more, but you cannot remove the fragrance once it has been added. So less is more at first.

Since this is a DIY soap flower, you can use flowery essential oils like cherry blossom, rose, ylang ylang, gardenia, gardenia, lavender, or jasmine. I prefer a strongly scented soap so I usually go for the patchouli or lemongrass essential oils. Both are very earthy scents, so they need to be sweetened with a much sweeter smelling essential oil.

Colorant

To make a two-toned soap, you will need two soap colorants. For this DIY flower soap, yellow is used for the center and a pinkish color for the petal. However, if you are using a white melt and pour soap base, the white base can be used for the center to create a two-toned soap.

Soap

Next you will need your melt and pour soap base. A solid white melt and pour soap base is used to make this particular DIY soap flower. However, you can use a clear melt and pour soap as well.

Mold

To start with, you will have to pour a small yellow center for your sunflower mold and let it dry completely. If you are working with one soap colorant, you can use the white soap base as the center. Once the center dries, prepare the rest of your soap for pouring into the mold. Let the soap dry, unmold, and use it!

diy soap flower

DIY Flower Soap

Ingredients:

Supplies:

Conclusion

For more help, read how to make homemade soap bars for beginners without lye. I am usually all about a really clean scented soap like this DIY flower soap. However, I am liking the DIY Coffee Soap more and more. In fact, I have already made another coffee soap DIY bar that you may like even more than the first one. Otherwise, you can make another one of the DIY soap bars for beginners. That is all for now! Enjoy making your DIY Flower Soap.

Posted in Bar Soap DIY, DIY

DIY Coffee Soap

This DIY coffee soap melt and pour version is a wonderful smelling homemade soap with coffee grounds! A few weeks ago, I made a cute and colorful DIY flower soap that I have finally shared with you all. While this first DIY coffee soap is not the prettiest soap in the world, it does have the same uniquely elegant aroma as the much more attractive rectangular coffee soap DIY that was made the second time around. The smell reminds me of a popular skin care company that sells their soap unwrapped and proudly by the ounce. So, I literally stopped what I was doing to share this DIY coffee soap melt and pour recipe with you!

DIY COFFEE SOAP MELT AND POUR

Most of my DIY bars of soap are made with loofah. This is because I love a good exfoliating soap. I live in a very humid area, so even in the A/C it is common to still feel a little sweaty during the day. So, when I shower, I try to keep my pours unclogged with an abrasive soap while keeping my skin coated in a nice fragrance.

HOMEMADE SOAP WITH COFFEE GROUNDS

Well, as much as I enjoy drinking coffee, I have never made a DIY coffee soap before.

The other day, I discovered a container of coffee. So, I got online to see what I could do with old coffee grounds instead of just tossing them out. Well, I came across a couple of different lengthy list of things to do with old coffee grounds. One of the things suggested was making a homemade soap with coffee grounds!

Well, to be clear, the “old” coffee grounds mentioned in the lists of things to do with old coffee grounds that I viewed were for used coffee grounds, not old and rancid coffee grounds. So, this DIY coffee soap is made with fresh used coffee grinds from my morning pot of coffee. With all that said, the smell turned out wonderful!

Initially, I was going to mix the DIY coffee soap with some vanilla essential oil. But, not wanting to waste a wonderful smelling vanilla essential oil on an experimental DIY coffee soap, I decided to use a maple fragrance oil that I have never really care for. To my surprise, the coffee and maple fragrance oil are a wonderful scent combination! And coincidentally, this DIY coffee soap is the perfect prelude to fall. The smell of this soap will go well with the cocoa butter lotion bar recipe.

Benefits

Apparently, there are some benefits of using DIY coffee soap.

  • Coffee grounds help minimize the appearance of cellulite.
  • With its own powerful aroma, it can get rid of stubborn hand odor or body odor.
  • The natural coffee essential oils provide an uplifting aroma.
  • As a caffeine, the soap is also likely an energizing bar of soap.

Suggestions:

  • Cut the melt and pour soap into small pieces before microwaving. This will help the soap melt evenly.
  • Melt the soap in an easy to handle and easy to pour container like a Pyrex glass with a handle. The container itself will usually get very hot when microwaving. So, handle melted soap with care.
  • When measuring the fragrance oil (or essential oil) use metal measuring spoons. Concentrated oils will eventually break down the plastic on a plastic measuring spoon.
  • I used a plastic massage bar soap mold. It was incredibly difficult to unmold the DIY coffee soap without breaking the plastic mold. Therefore, if possible, I recommend using a rubber massage bar mold if you intend to use the mold again for your next coffee soap DIY.
coffee soap diy
COFFEE SOAP DIY

Coffee Soap DIY

Ingredients:

Supplies:

Soap Review

So, the next morning I jumped in the shower to use this energizing DIY coffee soap. I still really like it – the smell and the way it exfoliates. The smell of this DIY coffee soap is perfectly scented for me. It is a very cozy scent that makes me want to read a good book or go sit by a fireplace with some coffee or hot chocolate.

And the coffee grounds are an awesome natural exfoliant! They are abrasive enough to exfoliate the skin well, yet much gentler than the DIY loofah soaps that I enjoy so much. I lathered with the back smoother side of the soap and exfoliated with the heavily populated massaging side of this DIY coffee soap. This is must try for the coffee house enthusiast.

Conclusion

You know where to find more DIY soap bars for beginners! If interested in learning more, you can read how to make homemade soap bars for beginners without lye. If you try your own DIY coffee soap melt and pour recipe, let me know how you like it.