Posted in DIY Mouthwash, DIY Teeth Care

DIY Mouthwash (Cinnamon Clove)

This wonderful tasting antibacterial DIY mouthwash recipe is a DIY cinnamon mouthwash. You can use this really pleasant tasting homemade cinnamon mouth before brushing, after brushing, or at any other time. It would also be the perfect mouthwash to use after oil pulling with cinnamon or oil pulling with cloves.

diy mouthwash

Ingredients

This DIY mouthwash recipe is prepared with distilled water, cinnamon essential oil, clove essential oil, and colorant.

1. Distilled Water

Distilled water is the standard type of water used for making DIY mouthwash. For good reasons, faucet water is a no-no unless you are in an emergency. Then you can make a tiny batch of the mouthwash to use all at once.

2. Cinnamon Essential Oil

Cinnamon essential oil is tasty, sweet, and spicy antimicrobial oil. It is very spicy, so a drop or two can go a long way. Since it has a natural sweet taste, you do not need to use a xylitol sweetener. This is true even when combined with a drop or two of the more bitter, yet equally spicy tasting clove essential oil.

3. Clove Essential Oil

Clove essential oil is a powerful antimicrobial that smells wonderful and tastes spicy. The clove oil is spicy, but not very sweet in taste. Therefore, cinnamon oil and clove oil pair well together. However, of greater importance is the fact that one of the active ingredients in clove essential oil is used by dentist to disinfect areas of the teeth. They do so to prevent infections before proceeding with a dental procedure. So, clove essential oil is a very nice addition to any mouthwash!

4. Colorant

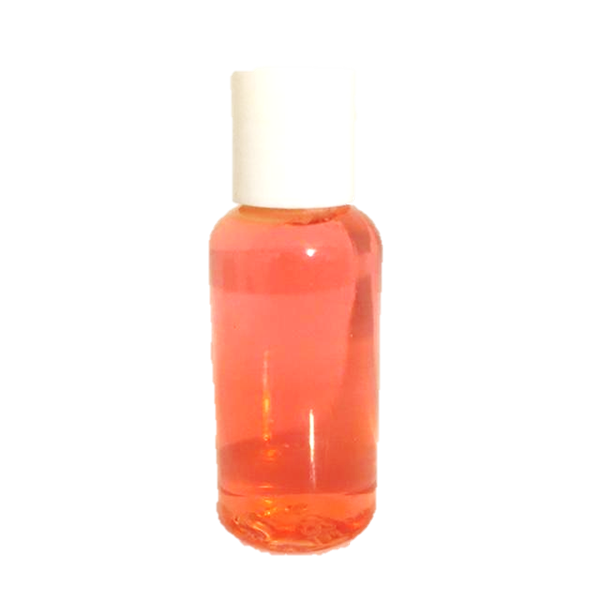
To complement the sweet and spicy taste of this cinnamon DIY mouthwash, less than a drop of red food coloring is added. It is an optional ingredient. However, it is kind of a nice extra.

diy mouthwash

DIY Cinnamon Mouthwash:

How To Prepare:

  1. Pour the distilled water in a clean bottle with a cap.
  2. Then add the essential oils and red colorant.
  3. Shake and the DIY mouthwash is ready to use.

How To Use:

  1. Shake before each use.
  2. Place a comfortable mouth full of the mouthwash in your mouth.
  3. Then, squish, gargle, and spit when done.

In Summary

If you like this homemade mouthwash recipe, you may also like the DIY peppermint mouthwash or the DIY rosemary mint mouthwash. Otherwise, you can check to see if another DIY mouthwash recipes has been added to the page. In the meantime, have fun making and using this cinnamon clove DIY mouthwash recipe.

Posted in DIY Mouthwash, Uncategorized

DIY Mouthwash (Rosemary Mint)

This rosemary mint flavored DIY mouthwash is another effective antibacterial mouthwash. The flavor of this mouthwash goes well with the rosemary mint tooth powder and the DIY oil pulling recipe with rosemary. Once you make your own mouthwash for the first time, you may keep making your own. It is a really quick and easy DIY mouthwash recipe. And what is more, it works just as well as the next mouthwash!

diy mouthwash

Ingredients

This rosemary mint flavored DIY mouthwash is prepared with distilled water, rosemary essential oil, peppermint essential oil, colorant, and sweetener.

1. Distilled Water

The DIY mouthwash is technically prepared with a popular preservative that many skin care companies use. However, you should still use distilled water. In this way, the mouthwash is started with a microbe free solution. Faucet water contains microbes and other stuff that you do not want to use to make your mouthwash and sit it on the counter. It is also a good idea to make relatively small batches of the mouthwash. The recipe is made for a travel-sized container that may still last a little longer than you would think.

2. Rosemary Essential Oil

Rosemary essential oil is an earthy smelling, potent antibacterial that can act like a preservative. Therefore, this DIY mouthwash can be used to easily freshen the breath and destroy cavity causing bacteria.

3. Peppermint Essential Oil

The peppermint essential oil is another antibacterial oil that is perfect for making mouthwash. With its minty cool taste, it complements the earthy smelling and tasting rosemary essential oil well.

4. Colorant

A tiny amount of liquid green food coloring is added to this rosemary mint DIY mouthwash. It is an optional ingredient, but it adds an authentic touch to this mouthwash recipe. An entire drop will be too much for the recipe below. Just touch the inside of the container with a dap of colorant. Then, when you shake the ingredients together, the mouthwash will turn a pretty light green color.

5. Sweetener

Since this is a mouthwash, you want to use an artificial sweetener to sweeten the taste of your mouthwash. Real sugar causes cavities and promotes bacterial growth. Therefore, the last thing you want to do is bath your teeth in sugary mouthwash. On the other hand, xylitol sweetener can be used to both sweeten and protect the teeth from cavity causing bacteria growth.

diy mouthwash

DIY Mouthwash Recipe:

How To Prepare:

  1. Place the distilled water in a clean container.
  2. Now add the essential oils, colorant, and sweetener.

How To Use:

  1. Shake the DIY mouthwash before each use.
  2. Then use the mouthwash in the same way you use a mouthwash from the store.
  3. Squish, gargle, and spit.

In Summary

If you like this mouthwash recipe, you may also like the DIY peppermint mouthwash. Otherwise, you may like another one of the DIY mouthwash recipes. In the meantime, I hope you can enjoy making and using this rosemary mint DIY mouthwash recipe.

Posted in DIY Mouthwash

DIY Mouthwash (Peppermint)

This homemade mouthwash is a classic peppermint-flavored DIY Mouthwash recipe. It destroys bad breath germs and leaves the mouth feeling minty cool and smelling fresh. And the awesome part is how easy it is to prepare with just 2-3 ingredients. You can make all the peppermint DIY mouthwash you want. Since it is preservative free and alcohol free, I would not make one big batch all at once. Instead, when you run out, simply mix another really quick batch for your next round of use. So, let’s get to the ingredients used to make this DIY mouthwash recipe.

diy mouthwash

Ingredients

This peppermint DIY Mouthwash can be prepared with a combination of distilled water, peppermint essential oil, xylitol, and colorant.

1. Distilled Water

Distilled water is a water prepared in such a way that microbes have been removed. So, when introduced to a clean bottle, your DIY mouthwash can stay fresh and ready to use. Some store homemade mouthwash and other homemade skincare products prepared with water in the refrigerator. So, that is another option as well.

2. Peppermint Essential Oil

Peppermint is a classic breath freshener used in toothpaste, toothpowder, and mouthwash. In its concentrated form, a little can go a long way to freshen your mouth. However, peppermint essential oil actually does more than just mask odor. It can actually destroy bad breath germ and bacteria that can lead to cavities. So, you can feel good about making and using this peppermint DIY mouthwash because it works! All essential oils are not the same. Since you will be using this in your mouth, you will need a food grade peppermint essential oil.

3. Xylitol

Xylitol is a popular sugar substitute used in commercial dental products and sugar free gum. Research indicates that in addition to sugar substitute not causing dental cavities, it can actually help prevent cavities. Therefore, if adding a sweetener to your DIY mouthwash, the xylitol sweetener is a good option. Dogs are not able to metabolize xylitol, so keep it away from your pets.

4. Colorant

The colorant is an optional ingredient. However, it is often added to commercial mouthwash products for a reason! The color blue naturally neutralizes yellow. Therefore, a slightly blue colored DIY mouthwash can make your teeth look whiter. However, keep in mind that a single drop can go a long way. The recipe shared below would need to be multiplied by 4X or more to use an entire drop of the blue food coloring. Using the recipe below, you can literally just dap some of the blue food coloring along the edge of the to create a slightly blue colored DIY mouthwash.

Homemade Mouthwash Recipe:

Preparation:

  1. Place the distilled water, peppermint essential oil, xylitol, and blue food coloring in a small mouthwash container with a cap.
  2. Shake until mixed well.
  3. It is ready to use like a regular mouthwash.

In Summary

You can use this peppermint DIY mouthwash with the rosemary mint tooth powder or after using one of the DIY oil pulling recipes with peppermint. The rosemary mint DIY mouthwash is another similar mouthwash option. Otherwise, you can try another one of the DIY mouthwash recipes when you finish using this one.

Posted in DIY Oil Pulling, DIY Teeth Care

DIY Oil Pulling Recipe with Cloves

This DIY oil pulling recipe with cloves is another way to mix up your oil pulling routine. If you like the oil pulling recipe with cinnamon, you will probably also really like this DIY oil pulling recipe with cloves. It too has an intense spicy and slightly sweet aroma that is perfect for some of the DIY teeth recipes. In fact, it is a popular ingredient for some mouthwash brands as well. If the idea of oil pulling is completely new to you, you might enjoy starting with – what is oil pulling for teeth?

diy oil pulling recipe

Ingredients

The two active ingredients used in this DIY oil pulling recipe are coconut oil and clove essential oil.

1. Coconut Oil

Coconut oil has so many beneficial properties for our general health and well-being. So, there is no surprise that is also very beneficial for this DIY oil pulling recipe with cloves. Coconut oil is a (1) deeply penetrating, (2) antimicrobial, that (3) increases blood flow. Being able to go beyond just the surface of the mouth, coconut oil provides a really deep cleaning for your oral cavity. As a broad-spectrum antimicrobial it not only destroys bacteria, but it can also destroy viruses like cold sores and yeast cells like candida. Regarding its ability to increase blood flow, our blood is the body’s transport system. It is constantly distributing beneficial nutrients throughout the body while picking up old byproducts (trash) that the body naturally creates. So, with coconut oil having the ability to increase blood flow in the mouth, it accelerates nutrient drop off and trash pick-up by means of the increased blood flow to the mouth. In this way, it can help improve or maintain the health of your teeth and gums.

This DIY oil pulling recipe can be prepared with refined coconut oil or unrefined (virgin or extra virgin) coconut oil. Refined coconut oil is easy to mix with essential oils because it does not smell or taste like coconut oil. Unrefined coconut oil smells and tastes just like coconut. So, if you enjoy the taste and smell of coconut, it is definitely an excellent choice as well.

2. Clove Essential Oil

Clove essential oil can help fight infections in the mouth, teeth, and gums. While destroying odor causing bacteria, it freshens breath with its intense spicy flavor and aroma. This wonderfully aromatic spice is also included in the re-mineralizing tooth powder in its powdered form. Clove essential oil is not only a powerful antibacterial, but also a pain reliever. According to research, some dentists use this clove oil to disinfect root canals and alleviate pain in the affected area. In this way, it is being used to fight or prevent infections in the mouth. Keep in mind that like cinnamon, clove essential oil is naturally quite spicy.

diy oil pulling recipe

DIY Oil Pulling Recipe:

Instructions:

  1. Place the coconut oil in a microwave safe dish.
  2. Then soften the coconut oil as needed.
  3. Now you can mix the needed amount of coconut oil with the clove essential oil.
  4. Stir the mixture together and then pour the DIY oil pulling recipe into a small mold.
  5. Place the mold in the refrigerator to let the oil pulling melts harden.
  6. Once hardened, you can unmold the oil pulling melts to use immediately.
  7. The extra melts should be stored in a container in the refrigerator.

How To Use:

  1. Before eating or drinking anything in the morning, place one of the DIY oil pulling melts in your mouth.
  2. The oil will melt easily, but you can chew the melt to help the process along.
  3. Once melted, gently push and pull the clove flavored oil back and forth through your teeth. You can do this for up to 20 minutes.
  4. When finished, please do not swallow! Spit the well-used oil into the trash can.

Conclusion

Please like, follow, comment, share, and subscribe! You can also follow The Ruhmage on Instagram and Pinterest. You can find more DIY oil pulling recipes to prepare or DIY teeth cleaner ideas. You may also like to learn more about the oil pulling benefits for teeth and the oil pulling benefits for skin. Or perhaps even some of the positive coconut oil pulling side effects. I hope you enjoy making and using this DIY oil pulling recipe with cloves.

Posted in DIY Oil Pulling, DIY Teeth Care, Uncategorized

DIY Oil Pulling Recipe With Cinnamon

The DIY Oil Pulling Recipe with cinnamon is one of my favorites. Cinnamon is a popular mouthwash flavor even among traditional mouthwash brands. This is because it has a naturally great flavor and active ingredients that promotes healthy teeth and gums.

diy oil pulling recipe

What Is Oil Pulling

With that said however, a DIY oil pulling recipe is much more effective and beneficial than traditional alcohol based mouthwash. Instead of drying out your mouth promoting bacteria formation with an alcohol based mouthwash, this DIY oil pulling recipe literally moisturize the mouth superficially and promote good blood flow to the teeth, gums, mouth, and face.

Ingredients

This DIY oil pulling recipe is prepare with coconut oil and cinnamon essential oil. I’ll highlight why these two ingredients are excellent for using in your daily oral care routine.

DIY Oil Pulling Recipe

1. Coconut Oil

I have to control myself when it comes to bragging about coconut oil and how amazing this natural wonder truly is! So, to be concise and specific to the oral care benefits that coconut oil provides I’ll start by saying that it is a potent antimicrobial that stimulates blood flow.

Microbes includes bacteria, viruses, and yeasts (fungi). So, as an antibacterial this DIY oil pulling recipe can get rid of bad breath germs that can also lead to cavity formation. As an antiviral, it can keep cold sores from forming around the mouth and/or greatly reduce the recovery time. And lastly, if you suffer with a yeast overgrowth like candida, this DIY oil pulling recipe can help you get rid of your white tongue along with a good low carb diet.

Our blood is a transport system. It carries all the nutrients the body needs to heal and repair itself. So with this DIY oil pulling recipe causing an increase in blood flow, there is an increase in nutrients being dropped off to your teeth and gums. And it will carry away any microbes that are picked up. And the coconut oil will also help trap some of the dead microbes for you to spit out afterwards.

You can use a natural coconut flavored organic virgin coconut oil to keep the coconut flavor or use a flavorless organic refined coconut oil to not have the coconut flavor in this DIY oil pulling recipe.

2. Cinnamon Essential Oil

Cinnamon smells wonderful, taste wonderful, and can accomplish wonderful things. Before salt started being used to preserve meat, cinnamon powder was used to keep the meat fresh and free of bacteria growth. So, cinnamon is a potent all natural antibacterial! It is no wondering why it is a popular choice for many oral care products. So, this DIY oil pulling recipe with cinnamon is prepared with a cinnamon essential oil to make sure the properties of the cinnamon can enter between the crevices of your teeth for maximum oil pulling and nourishing benefits. Cinnamon is a spicy oil, therefore a little bit can go a long way.

When starting to oil pull, it can really be like a mini detox. So, I like to follow up oil pulling with an antioxidant rich vitamin C powder afterwards to help with the detoxification process.

DIY OIL PULLING RECIPE WITH CINNAMON

Instructions:

  1. Soften the coconut oil of your choice as needed.
  2. Then mix the oil with the cinnamon essential oil.
  3. Now stir and pour the DIY oil pulling recipe into your small rubber mold.
  4. Place the mold in the refrigerator to let them harden for about 20 minutes.
  5. Afterwards, you can unmold the oil pulling melts to store and use what is needed.
  6. The extra tablets should be stored in a jar in the refrigerator to avoid melting.

How To Use:

  1. Before eating or drinking anything, place one of the DIY oil pulling melts in your mouth to chew.
  2. Then, gently push and pull the softened oil back and forth through your teeth for up to 20 minutes.
  3. When finished, please do not swallow! Spit the oil in the trash can.

Conclusion

I hope you have also enjoyed this DIY mouth recipe. You know where to find more DIY teeth cleaner ideas. You may also like the DIY oil pulling recipe with rosemary or the DIY oil pulling recipe with peppermint. That is all there is to making this DIY oil pulling recipe.

Posted in DIY Oil Pulling, DIY Teeth Care

DIY Oil Pulling Recipe With Rosemary

This DIY oil pulling recipe with rosemary provides many oral care health benefits. It is prepared with only two highly effective natural ingredients. In fact, one ingredient is my absolute favorite ingredient to work with because of all its amazing beneficial properties. And, the second ingredient is quickly working its way up my list as well. So, let’s talk about this DIY oil pulling recipe with rosemary oil!

diy oil pulling recipe

Ingredients

This DIY oil pulling recipe is prepared with coconut oil and rosemary essential oil. Both have amazing properties that can not only strengthen and whiten your teeth, they can help heal cavities in teeth and eliminate gum infections.

DIY Oil Pulling Recipe

1. Coconut Oil

Coconut oil is a potent broad spectrum antimicrobial. As an antibacterial, it can eliminate cavity causing bacteria in the mouth. Being an antiviral, it can reduce the occurrence of cold sores. And lastly, being antifungal, it can help to eliminate a white tongue caused by excess yeast in the body. In addition, it naturally increase blood flow to the teeth, gums, and face. And as a result, the blood can deliver needed nutrients more effectively resulting in stronger teeth and gums. On a more superficial level, coconut oil is also a natural teeth whitener. So, the coconut oil in this DIY oil pulling recipe provides many benefits.

A natural coconut flavored organic virgin coconut oil or a flavorless organic refined coconut oil can be used to prepare this may this DIY oil pulling recipe.

2. Rosemary Essential Oil

Rosemary essential oil is a very fragrant essential oil. It is a naturally potent antimicrobial with potent antioxidant properties as well. With its fragrant aroma, your mouth will feel really fresh after using this DIY oil pulling recipe with rosemary. And as an antimicrobial, it too can destroy cavity causing bacteria. In conjunction with the coconut oil, the antioxidant properties of rosemary essential oil can help enhance the complexion of your face.

diy oil pulling recipe

DIY Oil Pulling Recipe:

Instructions:

  1. Soften the unrefined or refined coconut oil as needed.
  2. Then mix the rosemary essential oil with the coconut oil.
  3. After stirring, pour the DIY oil pulling recipe with rosemary into a small mold.
  4. Place the mold in the refrigerator to let them solidify for about 20 minutes.
  5. Then, you can unmold the oil pulling melts to use.
  6. Store the extra melts in a container in the refrigerator.

How To Use:

  1. Before eating or drinking, chew one of the DIY oil pulling melts.
  2. Once melted, gently push and pull the oil through your teeth for up to 20 minutes.
  3. When finished, do not swallow! Spit the oil in the trash can.

Conclusion

I hope you enjoy using this DIY mouth recipe. You may also like the DIY oil pulling recipe with peppermint. You know where to find more all natural DIY teeth cleaner recipes. That is all there is to making this DIY oil pulling recipe.

Posted in DIY Oil Pulling, DIY Teeth Care

DIY Oil Pulling Recipe With Peppermint

This DIY oil pulling recipe with peppermint is a wonderful oil pulling recipe in many ways! Prepared with two powerful natural ingredients, they both naturally do their jobs really well. If you are new to oil pulling, you may really enjoy the benefits of this DIY oil pulling recipe with peppermint. Besides having whiter teeth, there are a variety of benefits that come from oil pulling.

DIY Oil Pulling Recipe

Ingredients

The two ingredients used to make this DIY oil pulling recipe are coconut oil and peppermint essential oil. These two simple ingredients have wonderful properties that make them an ideal choice for this teeth and gum cleaning recipe.

1. Coconut Oil

Coconut oil is naturally antibacterial, antifungal, and antiviral. Therefore, it can keep all the microbes in your mouth (bad breath germs) and around your mouth (cold sores) under control. Being antibacterial, oil pulling can help to rid the mouth of bacteria that leads to bad breath and cavities. And as a antifungal, it can keep things like thrush under control in individuals that suffer from a candida yeast overgrowth. And then too, as an antiviral, it can help prevent cold sores. This is just the start of what this DIY oil pulling recipe can do.

The coconut oil is a highly penetrating oil with anti-inflammatory properties. Since it penetrates the skin easily, it can perform its work at a deep level. For example, it can dilate the blood vessels in your teeth and gums to better carry out its antimicrobial actions. It does so while allowing your teeth and gums to be better nourished with vitamins and minerals that are transported in the blood that are required to keep your teeth and gums healthy.

And lastly, it can give your skin a healthy glow. It not only increase the blood in your teeth and gums, but it will also increases the blood flow to your face. With routine use, it can thereby improve the complexion of your skin. With that said however, this DIY oil pulling recipe can be like doing a detox. Therefore, drinking water and supplementing your diet with an antioxidant rich vitamin C powder afterwards can help the detoxification process on all levels – teeth, gums, and face.

You can use a natural coconut flavored organic virgin coconut oil or a flavorless organic refined coconut oil to may this DIY oil pulling recipe.

2. Peppermint Essential Oil

The menthol in peppermint essential oil will of course leave your mouth feeling minty fresh! However, it has other beneficial properties as well. Therefore, this DIY oil pulling recipe is also a soothing analgesic with antibacterial properties that may coincidentally improve that cough or cold you have.

Preparation:

Preparing this DIY oil pulling recipe could not be easier. First, decide to use either the naturally flavored or unflavored refined coconut oil for this DIY oil pulling recipe. Second, remember to use a food grade peppermint essential oil. Third, keep in mind that you only need to swish your mouth with about one tablespoon of the DIY oil pulling recipe. Therefore, use a small enough rubber mold to make it convenient to just grab an oil pulling tablet from the fridge to use.

A full tablespoon is about the size of a mini muffin mold. However, in my experience, a full tablespoon is a little bit more than what is needed. Therefore, I do not fill the mini rubber muffin mold completely. Once this DIY oil pulling recipe sets, you can use the melts immediately. They will melt very easily, so they must be stored in the refrigerator or a really cool room.

DIY Oil Pulling Recipe:

Instructions:

  1. Soften the coconut oil as needed.
  2. Then mix it with the peppermint essential oil.
  3. Stir and then pour this DIY oil pulling recipe into a small mold.
  4. Place in the refrigerator to let them firm for about 20 minutes.
  5. Then, unmold the oil pulling melts for use and storage.
  6. Store the extra tablets in a jar in the refrigerator.

How To Use:

  1. Before eating or drinking, place one of the DIY oil pulling melts in your mouth.
  2. Gently push and pull the oil through your teeth for up to 20 minutes.
  3. When finished, do not swallow! Spit in the trash can.

Conclusion

I hope you enjoy this DIY mouth recipe. You know where to find more DIY teeth cleaner ideas. That is all there is to making this DIY oil pulling recipe.

Source: https://www.nccih.nih.gov/health/peppermint-oil

Posted in DIY Mouthwash Tablets, DIY Teeth Care

Cinnamon Mouthwash Tablets

These cinnamon mouthwash tablets are currently my absolute favorite mouthwash tablets! While I like the strong minty flavor of the peppermint mouthwash tablets and the antibacterial properties of the rosemary mouthwash tablets, the cinnamon mouthwash tablets taste almost like cinnamon candy. And the really cool part is that it is all naturally provided by the essential oils used to make these mouthwash tablets.

diy mouthwash tablets

Feel free to jump to the cinnamon mouthwash tablets recipe at the end. However, I will start by briefly explaining each ingredient used to make the mouthwash tablets.

Baking Soda

This is an alkaline powder that can adjust the pH of your mouth. When the pH of your mouth is ever so slightly alkaline, it can prevent or minimize cavity causing bacterial growth. This ingredient is also mildly abrasive and often used in popular toothpaste brands and toothpowder recipes to help remove coffee and tea stains from the teeth.

Cream of Tartar

This is an all natural ingredient that helps to bring these DIY mouthwash tablets together. It is a common ingredient found in many baked goods.

Vitamin C

This is a natural antibacterial agent that the body needs to maintain the health of your teeth and gums. It is also a mild preservative. If you purchase a vitamin C powder, taking the vitamin C as a supplement can also greatly benefit the health of your teeth and gums. If you are interested in healing gum disease or cavities, you may also be interested in the health benefits of collagen and health benefits of sugar free DIY gummy bears.

Cinnamon Essential Oil

While many love the smell and taste of cinnamon, many do not realize what a powerful little spice this turns out to be. For the purpose of oral care, it destroys bacteria in the mouth that can cause cavities and gum disease. It is also a natural preservative that can help maintain the freshness of your cinnamon mouthwash tablets.

Clove Essential Oil

If you like nostalgic cinnamon flavored candies or cinnamon flavor gums, you may be surprised to know that you may actually be more of a clove fan. So, the clove essential oil is what make these delightful tasting cinnamon mouthwash tablets what they are. Besides the taste, some dentists use eugenol, a chemical that is contained in cloves and cinnamon, to kill germs on your teeth and your gums[3]. So, this ingredient is definitely not all about the taste. It is a potent antibacterial that can destroy germs in the mouth that can lead to cavities and gum disease.

Food Coloring

In spite of what it looks like, a red food coloring has been added to this very pleasant tasting cinnamon mouthwash tablets. While the mouthwash tablets look more orange in color, when you use it to rinse your mouth or to brush your teeth, the resulting color is indeed red. With that said, both the cinnamon and the clove essential oils are a deep orange or amber color. So, the essential oils take over the color that the eyes can see.

Coconut Oil

A whole lot can be said about coconut oil. It is just one of many miracles of nature! So, to keep it concise, coconut oil can help pull bacteria and toxins from the teeth and gums. It also increases blood flow. Therefore, this oil can improve the health of your teeth and gums significantly.

Distilled Water

Use a distilled water to make your DIY mouthwash tablets. Most of the other ingredients are naturally powerful antibacterial agents that will preserve the freshness of the cinnamon mouthwash tablets. However, it is still best not to introduce a tap water that will have some things you do not want in your mouthwash tablets.

Cinnamon Mouthwash Tablets

Yields: 25 (1/8 teaspoon sized scoops)

Making The Mouthwash Tablets

  1. Use a clean dry disinfected bowl. You can disinfect the bowl with a 3% peroxide or rubbing alcohol. When finished, wipe and dry the bowl out thoroughly with a clean dry paper towel.
  2. Now add baking soda, cream of tartar, vitamin C powder, and powdered food coloring (if using a powdered colorant). Use a spoon to stir and press out any clumps.
  3. Next add the food grade cinnamon essential oil, clove essential oil, and the drop of food coloring (if you are using a liquid food coloring instead).
  4. Mix the essential oil and colorant into the powder well. Then add the virgin coconut oil and distilled water. If the coconut oil is solid or the water is cold, warm it slightly before mixing it into the mouthwash tablets mixture. Coconut oil becomes a solid around 74-76 degrees Fahrenheit. So, if you live in a cold area, you may have to work in a warm room near the heater.
  5. Now you can line a cookie sheet with wax paper. Use a 1/8 teaspoon measuring spoon to scoop and shape the cinnamon mouthwash tablets into semi flattened balls.
  6. When finished, place the mouthwash tablets in a cool dry area to let them dry for about 3-5 hours.
  7. The mouthwash tablets will not become rock hard, but they will harden enough for you to handle without them easily breaking in your hands.
  8. However, once you place one of the mouthwash tablets in your mouth, they will quickly dissolve for you to use as a mouthwash or toothpaste (if wanted).

How to Use Mouthwash Tablets

  1. Place the tablet in your mouth…it will immediately start to dissolve.
  2. At this point, you can wet the bristles of your toothbrush to brush your teeth with the tablet. Or, take a sip of water to use it as a mouthwash.
  3. Simply swish it around in mouth for a minute or two.
  4. Then, gargle, spit, and rinse your mouth out with fresh wash.
  5. Spit the second rinse out as well.

Conclusion

That is all for now! You can find more DIY Mouthwash Tablets to make. I hope you like these cinnamon mouthwash tablets as much as I do!

Posted in DIY Mouthwash Tablets, DIY Teeth Care

Rosemary Mouthwash Tablets

These rosemary mouthwash tablets are an earthy flavored DIY mouthwash tablets. Rosemary has an extremely distinct flavor that is not easily confused. While not your traditional peppermint mouthwash tablets, it too makes a very aromatic and clean smelling mouthwash tablets.

rosemary mouthwash tablets

If you have already made one of our mouthwash tablets, you can probably just jump to the rosemary mouthwash tablets recipe at the bottom of the page. But I will take a moment to provide a few details about each ingredient used.

Baking Soda

Cavities and gum disease often develop when the mouth is too acidic. This problem can develop as a result of stress and the things we eat. Since baking soda is alkaline, it can neutralize the acids in your mouth. And, as a result, cavity causing bacteria can be removed and hindered. It is also effective for removing stains on the teeth when used appropriately.

Cream of Tartar

Cream of tartar is naturally found in a variety of plants. It is used in many baked goods that we eat. So, while you do not swallow this rosemary mouthwash produced as a result of winemaking. So, even though you will not be swallowing these rosemary mouthwash tablets, the ingredient is all natural and safe to use.

Vitamin C

The vitamin C powder is a beneficial addition to the rosemary mouthwash tablets in a couple of ways. First, our teeth and gums need vitamin C to remain strong and healthy. Second, it can destroy bacteria, fungus, and viruses. And lastly, it can act like an all natural preservative for your DIY mouthwash tablets.

Rosemary Essential Oil

Rosemary essential oil is a stimulating oil with anti-inflammatory properties. So, just the smell will invigorate you making you feel more alert. While its properties will help reduce any swelling in the gums and as a result, improve blood flow to the teeth. With improved blood flow to the teeth, they can stay healthy or become healthy. It is also a wonderful antibacterial that can leave your mouth feel super clean and fresh after using these rosemary mouthwash tablets. So, they too can definitely help you prevent and get rid of cavities.

Green Food Coloring

The green food coloring is an optional ingredient. But, it does make the rosemary mouthwash tablets that much more fun to use. A grass green food colorant was add to this rosemary mouthwash tablets recipe. However, the color turned out to be a pretty neon green instead of grass green. So, it is a fun color to work with.

Coconut Oil

Coconut oil is a natural antibacterial, antifungal, and antiviral that can help strengthen your teeth and gums. The oil is highly penetrating as it naturally increases the blood flow to your gums and teeth. This oil often used for different oil pulling methods.

Distilled Water

Distilled water should be used in your rosemary mouthwash tablets. Then, you should let the tablets dry completely before storing them in the refrigerator. The refrigerator will help keep them fresh longer. However, they are full of natural preservatives. I personally keep mine on the counter in a cool room.

mouthwash tablets

Rosemary Mouthwash Tablets

Yields: 25 (1/8 teaspoon sized scoops)

Making The Mouthwash Tablets

  1. Begin with a clean and dry bowl. You can disinfect the bowl with 3% peroxide or rubbing alcohol. Afterwards, you should use clean and dry paper towels to completely dry the bowl before starting the next step.
  2. Now you can add the baking soda, cream of tartar, vitamin C powder, and powdered food coloring (if you are going to use a powdered food colorant). Use a spoon to stir the mixture well. Mash any lumps that you see until the powder for the mouthwash tablets is completely smooth.
  3. Now add the food grade rosemary essential oil and the drop of liquid food coloring (if you are using a liquid food coloring instead).
  4. Mix the essential oil and colorant into the powder well. Then add the virgin coconut oil and distilled water. If the oil is solid, warm the oil before mixing it into the mouthwash tablets mixture and work in a warmer room to keep the oil liquid while you make the mouthwash tablets.
  5. Now you can line a cookie sheet with wax paper. Use the 1/8 teaspoon measuring spoon to measure and shape the mouthwash tablets.
  6. Sit the tablets in a cool dry area to let them dry for about 3-5 hours. I live in a very humid area and sometimes it only took a couple of hours to dry. But different oils and ingredients may dry differently.
  7. The mouthwash tablets will not become rock hard, but they will become hard enough for you to handle without them falling apart when you touch them.

How to Use Mouthwash Tablets

  1. Once you place one of the dried mouthwash tablets in your mouth, they will quickly dissolve for you to use as a mouthwash or toothpaste (if needed or wanted).
  2. At this point, you can either wet the bristles of your toothbrush to brush your teeth with it or take a sip of water to use it as a mouthwash.
  3. Simply swish the mouthwash around in mouth for a minute or two.
  4. Then, gargle, spit, and rinse your mouth out with fresh wash.
  5. Spit the water rinse out of your mouth as well.

Conclusion

That is all I have for now! Sometimes it is nice to have a variety of different flavors available to use. So, you may like some of the other DIY Mouthwash Tablet Recipes as well. I like to use these rosemary mouthwash tablets periodically.

Posted in DIY Mouthwash Tablets, DIY Teeth Care

Peppermint Mouthwash Tablets

These strong peppermint mouthwash tablets are wonderful DIY mouthwash tablets. I like both the smell and the color of these peppermint mouthwash tablets. Plus they are super convenient to use as a mouthwash or like a tooth powder. These DIY mouthwash tablets are easy and kind of fun to make with the wonderful soothing smell of peppermint filling the air. So far, these peppermint mouthwash tablets are my favorite because of the fresh and cool sensation that it provides. However, I like the well known antibacterial properties that the rosemary mouthwash tablets provide.

peppermint mouthwash tablets

So, let’s get to this easy DIY mouthwash tablets recipe. I will start with a basic explanation of each ingredient used. But you can skip ahead to the peppermint mouthwash tablets recipe located at the bottom of the page.

Baking Soda

Cavities and oral health problems develop in an acidic environment that can start with the foods you actually eat. Well, baking soda is an all natural alkaline powder that can neutralizes the acidity of your mouth. In doing so, it can retard bacteria growth and get rid of bacteria in the mouth. Being slightly abrasive, it can also be used to help remove stains from the teeth.

Cream of Tartar

Cream of tartar is an all natural thickening agent that is used to make the mouthwash tablets. It is found naturally in plants and it is also produced as a result of winemaking. So, even though you will not be swallowing the peppermint mouthwash tablets, the ingredient is a highly ingestible food product.

Vitamin C

Our teeth and gums need Vitamin C to stay healthy and strong. However, being able to kill bacteria, this powder can also double as a preservative. Therefore the Vitamin C is a win-win in the DIY peppermint mouthwash tablets recipe that you do not want to skip. With that said, however, taking a daily Vitamin C supplement will likely be even more beneficial to the health of your teeth and gums instead of just brushing with a powder that contains Vitamin C powder.

Peppermint Essential Oil

Peppermint essential oil makes your mouth feel cool and minty fresh. It is also an analgesic. So, it can help to alleviate minor toothaches and pains. In addition, it can also kill bacteria in the mouth that can lead to tooth decay and gum disease. So, it can help prevent and get rid of cavities.

peppermint mouthwash tablets

Blue Food Coloring

The blue food coloring is completely optional. A regular primary blue food colorant was add to this peppermint mouthwash tablets recipe. However, the color changes drastically to a deep turquoise blue as it dries. So, it is a fun color to work with. On a more beneficial note, the color blue can neutralize the yellow stains on your teeth making them look whiter. Ideally, you should use a blue food coloring powder instead of a liquid to help maintain the freshness of your peppermint mouthwash tablets.

Coconut Oil

Coconut oil is a natural antibacterial, antifungal, and antiviral. It naturally increases blood flow in the gums and teeth. Therefore, this oil can help keep or get your teeth and gums healthy and strong. Coconut oil is a very popular oil used for oil pulling. It is definitely my favorite oil to work with as I have worked with it for many years now.

Distilled Water

You definitely want to use distilled water in your DIY peppermint mouthwash tablets and let the tablets dry completely before storing them in the refrigerator. The refrigerator will help keep them fresh longer. However, they are full of natural preservatives.

diy mouthwash tablets

Peppermint Mouthwash Tablets

Yields: 25 (1/8 teaspoon sized scoops)

Making The Mouthwash Tablets

  1. Start with a clean dry disinfected bowl. You can disinfect it with 3% peroxide or rubbing alcohol. Then wipe and dry the bowl really well with clean dry paper towels.
  2. Now you can add the baking soda, cream of tartar, vitamin C powder, and powdered food coloring (if using a powdered colorant). Use a spoon to stir well and smash away any lumps.
  3. Now add the food grade peppermint essential oil and the drop of food coloring (if you are using a liquid food coloring).
  4. Mix the essential oil and colorant into the powder well before adding the virgin coconut oil and distilled water. If the oil is solid, warm it slightly before mixing it into the mouthwash tablets mixture.
  5. Now line a cookie sheet with wax paper. Use a 1/8 teaspoon measuring spoon to scoop and shape the peppermint mouthwash tablets.
  6. Sit them in a cool dry area to let them dry for 3-5 hours.
  7. The mouthwash tablets will not become rock hard, but they will harden enough for you to handle without them breaking easily in your hand.
  8. Once you place one of the mouthwash tablets in your mouth, they will quickly dissolve for you to use as a mouthwash or toothpaste (if needed).

How to Use Mouthwash Tablets

  1. Place the tablet in your mouth…it will immediately start to dissolve.
  2. At this point, you can wet the bristles of your toothbrush to brush your teeth with it. Or, take a sip of water to use it as a mouthwash.
  3. Simply swish it around in mouth for a minute or two.
  4. Then, gargle, spit, and rinse your mouth out with fresh wash.
  5. Spit the second rinse out as well.

Conclusion

I hope you did indeed learn something new or at least find something to do here on the blog. I hope to share more DIY mouthwash tablets combination soon. These peppermint mouthwash tablets are simple, budget-friendly, and useful DIY mouthwash tablets recipe for you to make.