Posted in DIY Face Care, DIY Face Scrub

DIY Vitamin C Scrub

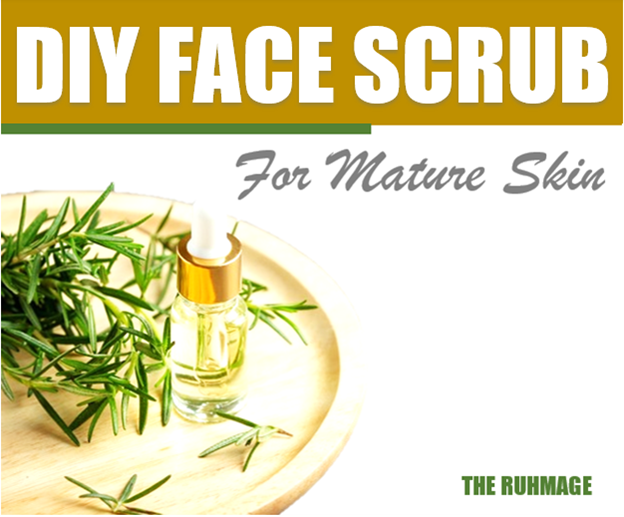
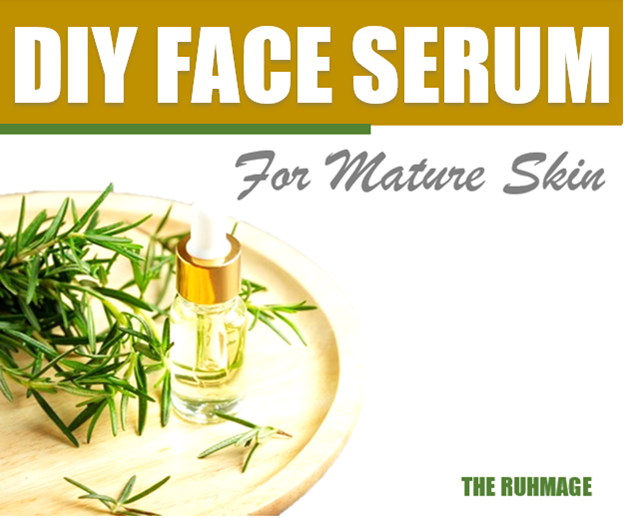
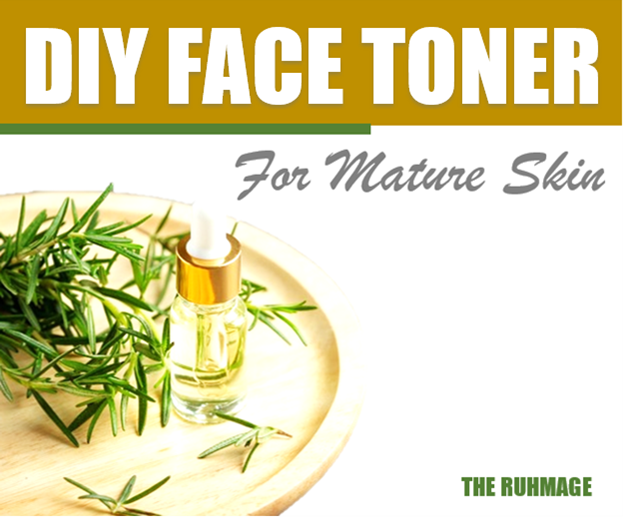
This DIY vitamin C scrub is one of the DIY face scrubs. It is designed to complement the DIY vitamin C face wash, DIY vitamin C face toner, and DIY vitamin C face serum. This DIY vitamin C scrub may be one of the most effective and beneficial of all the face care application steps.

If you have ever looked into skincare, you soon discover that vitamin C can play an important role in maintaining the appearance of the skin and improving the appearance of the skin in multiple ways. While research indicates that vitamin C is most beneficial for collagen production when taken orally, vitamin c can have its benefits when applied to the skin as well. So, let’s highlight those details for this vitamin c face scrub DIY.

diy vitamin c scrub

Ingredients:

Vitamin C is (1) mildly abrasive and (2) mildly acidic. Therefore, when applied to the skin it can act like both a physical exfoliant and a chemical exfoliant. In this way, vitamin C can help to noticeably minimize the appearance of scars. For these reasons, this DIY vitamin C scrub may be one of my favorite DIY vitamin c skincare recipes to use. The ingredients needed to make this DIY vitamin C scrub include an (1) exfoliant and (3) soap solution.

1. Exfoliant

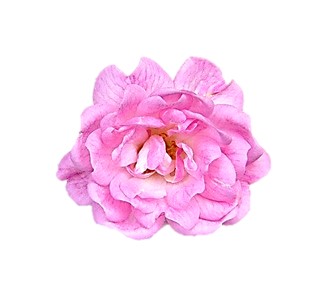
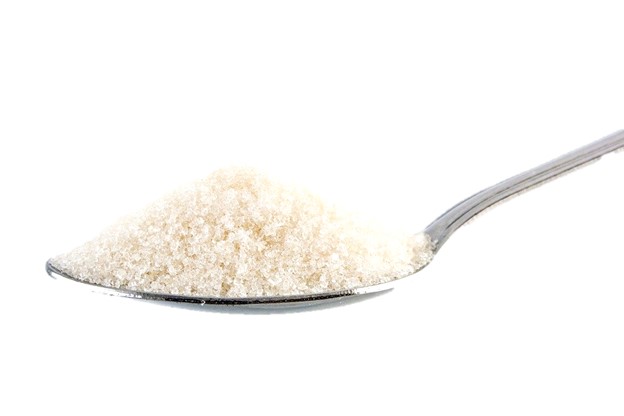
For the exfoliant, you can use either sugar or ground flaxseed. Sugar is recommended for normal skin without any signs of wrinkles. A fine white sugar is mildly abrasive and can help naturally moisturize the skin. Ground flaxseed can be used on aging skin that shows some signs of wrinkles. It is a very mild exfoliant that ends up like a moisturizing face mask. The ground flaxseed leaves the skin feeling wonderfully smooth because it is loaded with beneficial properties for mature skin.

2. Soap Solution

The DIY vitamin C face wash is the soap solution used to prepare this DIY face scrub. It will provide you with the same benefits as the face wash. However, when combined with the exfoliant of choice, it can be used to gently scrub and clean the skin.

diy vitamin c scrub

Ingredients

Instructions:

  1. Place the fine white sugar or ground flaxseeds in a small bowl.
  2. Then, when ready to use, add the soap solution.
  3. Stir the mixture together with a spoon or with your fingers before applying it to the skin.

How To Use:

  1. To start opening your pores, wet your face with warm water.
  2. Then start applying the DIY vitamin C scrub to your face starting with the chin.
  3. Rub the scrub on your face in an upward motion using small circular motions.
  4. Then, after gently scrubbing the chin and cheeks well, continue applying the scrub over your nose and forehead area. (Avoid scrubbing the soft skin tissue under the eyes.)
  5. Now rinse your face with warm water.
  6. Then gently pat your face dry with a soft cloth.
  7. Finally apply the DIY Vitamin C Toner and DIY Vitamin C serum.

In Summary

This vitamin c face scrub DIY is incredibly easy to prepare if you are already using the DIY vitamin C face wash. If needed, you can find more DIY face care products for various skin types. Please like, follow, and share. This concludes the information for making and using the DIY vitamin C scrub.

Posted in DIY Face Toner

DIY Vitamin C Toner

This DIY vitamin c toner recipe is an easy DIY face toner for mature skin. It should be the second step in your DIY face care routine. You will notice that this post and recipe complements what has been shared for the DIY vitamin c face wash and the DIY vitamin c face serum. So, let’s get started with this easy to make DIY face toner.

diy vitamin c toner

Ingredients

The DIY vitamin c toner recipe is prepared with water, witch hazel, essential oils, and vitamin C.

1. Water

The DIY face toner recipes include distilled water as one of the ingredients. Distilled water is used because it has been processed in such a way that the contaminants have been removed. This is not the case with faucet water. Therefore, faucet water should not be used in your DIY skin care products.

2. Witch Hazel

This liquid solution is a very popular astringent. It assists with toning and cleaning the face after you have washed and rinsed the DIY vitamin c face wash from the skin. Witch hazel can also help to shrink the pores on your face while tightening the skin.

3. Essential Oils

This DIY vitamin c toner recipe is prepared with rosemary essential oil and ylang ylang essential oil. Both are essential oils that are beneficial for promoting youthful looking skin. Rosemary essential oil is powerful antioxidant that can penetrate the skin and help to eliminate free radicals. Ylang ylang essential oil is a moisture balance restoring oil. Therefore, it can assist with giving your skin a healthy natural glow. The DIY face toner for mature skin goes into more detail about these two essential oils.

4. Vitamin C

A vitamin c powder is used in this DIY vitamin c toner recipe. Vitamin C is a powerful free radical scavenger. As the body carries out normal body functions on a cellular level, free radicals are naturally generated. If allowed to accumulate, they can make the appearance of the skin look aged. Vitamin C gets rid of free radicals and therefore helps with the appearance of the skin. Another very powerful way in which vitamin c helps the skin is in collagen production. Collagen production is limited in part to the amount of vitamin C available. However, with all that said, what was stated for the DIY vitamin c face serum and DIY vitamin c face wash applies here too. Research indicates that vitamin c can provide the most benefit for the skin when it is taken orally. Therefore, a very simple oral vitamin c skin care recipe is shared below in this post as well. If you are using the entire vitamin c skin care routine, you can just drink the recipe once. You do not have to drink the vitamin c with every step of your face care routine.

diy vitamin c toner

Vitamin C Toner Recipe

Instructions:

  • Place all of the ingredients in a measuring cup with a pourable spout.
  • Use a spoon to stir the DIY vitamin c toner together.
  • Then pour the toner in the bottle.

How to Use:

  1. Place 1/4 teaspoon of the vitamin c powder in a 16-ounce bottle of drinking water.
  2. Shake the bottle of water well. Then, drink the water (assuming that you have not already done so.)
  3. Repeat once as wanted or as needed in the afternoon.
  4. Now after washing your face with the DIY vitamin c face wash, rinse well and pat your face dry.
  5. Then use a cotton ball or cotton pad to apply the DIY vitamin c toner recipe.
  6. Do not rinse. Let the toner air dry.
  7. And then finally, you can apply the DIY vitamin c face serum.
Posted in DIY Face Care, DIY Face Wash

DIY Vitamin C Face Wash

The DIY vitamin C face wash is designed to complement the DIY vitamin c face serum. Vitamin C is a well-known potent antioxidant with anti-aging skin care benefits. It is definitely one of my favorite products to use and recommend for skin care. However, it may not be in the way that you are currently thinking.

diy vitamin c face wash

Ingredients

This DIY vitamin c face wash is prepared with soap, essential oils, and vitamin c.

1. Soap

This DIY face wash is prepared with a liquid soap base. An olive oil soap base is one of the best liquid soaps to use on aging skin because it is moisturizing. For oily skin, a liquid pure coconut soap base is recommended because it is a deep cleaning soap that can help relieve oily skin.

2. Essential Oil

This DIY vitamin C face wash is based on the DIY face wash for mature skin. Therefore, it contains rosemary essential oil and ylang ylang essential oil. Rosemary essential oil is a potent free radical scavenger that is beneficial for all skin types. The ylang ylang essential oil can help to increase the natural oil production in aging skin.

3. Vitamin C

As a potent antioxidant, vitamin c is also a free radical scavenger. Free radicals are natural byproducts (scraps) that are generated as the body carries out its innumerable functions that we never even think about. As the naturally created byproducts or scraps accumulate, they basically age us physically and eventually visibly. Antioxidants like vitamin c scavenges and rids the body of free radicals. So, in this way, all by itself vitamin c is anti-aging product. However, vitamin c does even more for the skin when it is in the presence of collagen.

Research studies shows that we can get the most skin care benefits from vitamin C when it is taken orally. Therefore, while this DIY vitamin C face wash can provide skin care benefits with active ingredients for mature skin, it includes a simple oral vitamin c recipe for skin care as well. You can learn more about this in the post for mature skin care routine.

DIY Vitamin C Face Wash

Instructions:

  1. Place all of the ingredients in a glass measuring cup with a pourable spout.
  2. Use a spoon to stir the ingredients well.
  3. Then, pour the face wash mixture in the bottle.

How to Use:

  1. Place 1/4 teaspoon of the vitamin c powder in a 16-ounce bottle of drinking water.
  2. Shake the bottle of water well. Then, drink the water.
  3. Repeat as wanted or as needed in the afternoon.
  4. Now wet your face and apply the DIY Vitamin C face wash to clean your face.
  5. Then, rinse well and pat your face dry.
  6. Follow up with the DIY vitamin C face toner and the DIY vitamin C face serum.
  7. Feel free to review the correct order to apply skin care as needed.
Posted in DIY Face Care, DIY Face Serum

DIY Vitamin C Serum

This DIY vitamin C serum is a DIY vitamin c serum with coconut oil. Vitamin C powder is one of my favorite all-natural remedies used and recommended for treating both the skin and the body. Vitamin C is a potent antioxidant that works along with collagen to keep our hair, nails, teeth, and joints strong. This is one reason why vitamin C collagen gummies are becoming so popular in the beauty industry. As a potent antioxidant, I have personally discovered that enough vitamin C can also work wonders on the dark under eye circles. However, it does so in a way that you are probably not thinking since this is a DIY vitamin C serum recipe. Keep reading to the end to find out more about the gummies and under eye circles remedy as well.

1. Vitamin C

According to research studies, vitamin C is more effective for the skin when it is taken orally. In this way, the blood flowing to the skin can carry and deliver the necessary vitamin C to the skin surface.  When applied topically, vitamin C has a difficult time passing through the external epidermal layer of skin and into the dermal layer of the skin that actually controls the structure and elasticity of the skin. So, this is where a DIY vitamin C serum with coconut oil may be more beneficial.

2. Coconut Oil

Coconut oil is an all-natural, deeply penetrating oil that increases blood flood throughout the body even when applied topically. In fact, coconut oil is one of the VERY few things that can cross over the blood brain barrier. If you have never used coconut oil before, one of the first things you may notice is an increase in your mental alertness and an increase in your physical energy. For this reason, a DIY vitamin C serum with coconut oil is definitely recommended for a daytime application.

With all of that said, if you are going to use a DIY vitamin c serum, making it with coconut oil and other skin nourishing ingredients that can penetrate the skin may be the best way to go. This DIY vitamin C serum with coconut oil is created based upon the formula for the DIY Face Serum for Mature Skin. You can learn more about the active ingredients on that page. Also be sure to review the mature skin care routine for some additional skin care tips.

DIY Vitamin C Serum Recipe:

Instructions:

  1. Use a small funnel to place all of the ingredients in the bottle.
  2. Secure the lid on the bottle well. Then shake well.
  3. Another option is to place all of the ingredients in a glass measuring cup that has a pourable spout.
  4. Then, you can use a spoon to stir the ingredients well before pouring the mixture in the bottle.

How to Use:

  1. Place 1/4 teaspoon of the vitamin c powder in a 16-ounce bottle of drinking water.
  2. Shake the bottle of water well. Then, drink the water. This is the under-eye circles remedy.
  3. Repeat as wanted or as needed in the afternoon.
  4. Now apply the DIY Vitamin C Serum to clean, dry skin. You can review the correct order to apply skin care as needed.

In Summary

This formula has a wonderful fragrance and feels really nice on the skin. If you like to make your own homemade skin care products, you may also like to make your own DIY Collagen Gummy Bears. In the meantime, enjoy the DIY vitamin C serum with coconut oil.

Photo Credit: Flyer vector created by macrovector – www.freepik.com

Posted in DIY Face Care, DIY Face Scrub

DIY Face Scrub for Mature Skin

This DIY face scrub for mature skin leaves the skin feeling noticeably softer and smoother after the very first use. So, I am excited to share this recipe with you! However, keep in mind that a DIY face scrub for mature skin should be carefully selected based on the integrity of your skin. Depending on how an individual eats, exercises, and endeavors to take care of themselves physically, our skin will all age differently. Therefore, when speaking about “mature skin” it can be hard to call a number. If you are just getting started, you may be interested in the outlined mature skin care routine.

There are basically two types of scrubs or skin exfoliators that can be used including: (1) chemical scrubs and (2) physical scrubs. A chemical scrub is usually liquid and not physically abrasive at all. Therefore, it is physically very gentle on the skin. A physical scrub can also be very gently. However, it will usually provide some degree of texture that will physically scrub or exfoliate the skin. If your skin is fragile or tears easily, you may not want to use physical scrubs at all.

DIY Face Scrub For Mature Skin

This DIY face scrub for mature skin is a gently exfoliating and soothing physical scrub. It is prepared with an all-natural gelatinous fiber. Therefore, this DIY face scrub for mature skin gently scrubs while simultaneously moisturizing the skin. In fact, it may almost feel like you are getting a gentle scrub and facial peel all at once. So, let’s talk about the ingredients used for this DIY face scrub.

Ingredients

This DIY face scrub for mature skin is designed to complement the DIY face wash for mature skin, the DIY face toner for mature skin, and the DIY face serum for mature skin. Therefore, the ingredients used to make this wonderful scrub for mature skin includes (1) flaxseed powder and (2) a soap solution.

1. Flaxseed Powder

The flaxseed powder is made from the flax seed. In its powdered form, you can really harness the nourishing and moisturizing benefits from the gelatin it contains. It is a gentle scrub that contains beneficial fatty acids that help moisturize and smooth the skin. It also contains anti-inflammatory properties to sooth any areas of irritated skin. Then, it also contains minerals along with vitamins A, C, and E.

Vitamin A is needed for appropriate cell reproduction. While vitamin C is needed to (1) destroy age inducing free radicals and (2) work along with collagen synthesis to keep the skin smooth and tight. Vitamin E is a potent antioxidant that is used to combat free radicals and aging.

With all that said, this flaxseed powder is an excellent choice for this DIY face scrub for mature skin. It gently exfoliates the skin with the initial application. Then, as the skin warms and actives the gelatinous properties, the scrub becomes slightly hard. Once you wet the scrub a second time with water, it makes your skin feel silky smooth.

2. Soap Solution

The DIY face wash for mature skin is the soap solution used to prepare this DIY face scrub for mature skin. The soap solution is a combination of a moisturizing olive oil soap base, antioxidant-rich rosemary essential oil, and moisturizing ylang ylang essential oil.

DIY Face Scrub For Mature Skin

DIY Face Scrub for Mature Skin

Preparation:

  1. Place the finely ground flaxseed powder in a small plastic container.
  2. Add the DIY face wash for mature skin.
  3. Mix with your finger and gently rub onto damp skin.
  4. Let sit for 1-2 minutes until it hardens.
  5. Then, wet your fingers to soften the scrub for a silky-smooth phase II part of the scrub.
  6. Finally, rinse your face well with warm water. And then, pat your face dry with a clean, soft towel.
  7. Apply the DIY face toner for mature skin and then the DIY face serum for mature skin.

*If the flaxseed powder is more like a flaxseed mill, you can grind the flaxseed mill in a small food processor or grinder until it is more like a fine powder.

Conclusion

That is all for now! You know where to find more DIY face products! This completes the DIY face scrub for mature skin.

Sources:

https://www.mountsinai.org/health-library/supplement/vitamin-a-retinol

https://en.wikipedia.org/wiki/Distilled_water

Posted in DIY Face Care, DIY Face Serum

DIY Face Serum for Mature Skin

The DIY face serum for mature skin is a wonderful smelling therapeutic face serum. A good face serum nourishes both the skin surface and deep into the skin pores. This DIY face serum for mature skin (1) moisturizes, (2) contains natural antioxidants, and (3) has skin rejuvenating properties that benefit both the skin and the pores. The formula for this particular face serum not only nourishes mature skin, but it also calms the body while energizing the mind.

DIY Face Serum For Mature Skin

Ingredients

The DIY face serum for mature skin is designed to be used after the DIY face wash for mature skin and the DIY face toner for mature skin. Mature skin is often a little lackluster and dehydrated. Therefore, the DIY face serum for mature skin is a step you do not what to a skip in your skin care routine. This serum is prepared with coconut oil, ylang ylang, and rosemary essential oil.

1. Coconut Oil

Coconut oil penetrates deep into the skin and increases blood flow. With the increase in blood flow, the coconut oil can make the skin appear more youthful and energize the mind. While penetrating the skin, it carries and delivers the properties found in the ylang ylang and rosemary essential oils.

To prepare this DIY face serum for mature skin, a fractionated liquid coconut oil is recommended. Nevertheless, if you are familiar with the properties of a solid refined (unscented) coconut oil, it can be used instead.

2.Ylang Ylang

Ylang ylang essential oil is a very important moisturizing oil that is used in this DIY face serum for mature skin. It not only gently moisturizes the skin, but it also stimulates the natural oil production in the skin. Therefore, with regular use of the ylang ylang, it can help restore the natural healthy glow and luster of the skin.

3. Rosemary

Rosemary essential oil is a potent antioxidant. Antioxidants are an important ingredient in this DIY face serum for mature skin because of free radicals. Free radicals are naturally produced in the body. However, they cause the skin to visibly age. Well, antioxidants free radical scavengers that destroy free radicals. In this way, the antioxidants can reduce the signs of aging in the skin. Therefore, in a skin care (or health care) routine, natural antioxidants are definitely our friends.

*Rosemary essential oil is technically not an oil because it does not contain fat. Therefore, when mixing rosemary with the other oils in this serum, it will behave comparatively different that some of the other DIY face serum mixtures. When you mix the serum, it may become seemingly sticky (it is not) or somewhat of a semi-solid looking like a type of balm. For this reason, a jar will be better suited for this serum.

DIY Face Serum For Mature Skin

DIY Face Serum For Mature Skin

Instructions:

  1. Place the fractionated coconut oil, ylang ylang and rosemary essential oil in a small clean jar with a lid.
  2. Use a small spoon to gently stir this DIY face serum for mature skin recipe together.

How To Use:

  1. After using the DIY face wash for mature skin and the DIY face toner for mature skin allow your face time to air dry. If needed, you can gently pat your face dry with a soft, clean face towel.
  2. Next, gently massage about a dime-sized amount of the DIY face serum for mature skin into your skin.
  3. As needed, feel free to review how to properly apply face serum.

Conclusion

This is a wonderful DIY face recipe to use on mature skin all year long. When taking care of mature skin, the correct combination of oils and antioxidants can really help. You may be interested in reading the outlined mature skin care routine. This DIY face serum for mature skin may be just what your skin needs.

Posted in DIY Face Care, DIY Face Toner

DIY Face Toner For Mature Skin

The DIY face toner for mature skin is a lovely smelling hydrating facial astringent formulated for mature skin. Like the DIY face wash for mature skin, it is designed to address common concerns with maturing skin. Therefore, this DIY face toner for mature skin (1) moisturizes, (2) contains natural antioxidants, and (3) has skin rejuvenating properties.

DIY Face Toner For Mature Skin

Ingredients

After washing your face with the DIY face wash for mature skin, you can apply the DIY face toner for mature skin. The toner is then followed up with the DIY face serum for mature skin. The ingredients used to prepare this lovely DIY face toner for mature skin are distilled water, witch hazel, essential oils, and vitamin E oil.

1. Distilled Water

Distilled water is used to provide a clean solution for you to start making the toner. Faucet water is a no-no. Once you have the needed amount of distilled water, you can add the remaining all natural ingredients for this DIY face toner for mature skin. In warmer climates, the DIY face toner for mature skin should be stored in the refrigerator to maintain its freshness. When needed, you can pull out the toner for a refreshing mist during your DIY skin care routine.

2. Witch Hazel

The witch hazel is an all-natural antiseptic commonly used on the skin. It helps to pull the skin tighter and assists with blending the oil and water together. However, it is not an emulsifier, therefore the DIY face toner for mature skin should still be shaken before each use.

3. Rosemary

Rosemary essential oil has potent antioxidant properties. Antioxidants combat free radicals that naturally occur in the body that causes the skin to age. Therefore, rosemary essential oil is incorporated into the DIY face wash for mature skin to help combat free radicals. However, rosemary essential oil also naturally increases the blood flow in the skin and brain. This increase in blood flow improves the appearance of the skin and makes us mentally more attentive, alert, and energetic. When we feel good, we often look good. So, the rosemary essential oil is a triple win. On top of that, it is also a pain reliever and a stress reliever – which are both things that can make us visibly age faster. So, the rosemary essential oil is a really wonderful addition to this DIY face wash for mature skin!

*Rosemary essential oil is not really an oil. Therefore, it will not stay blended like other essential oils. Simply shake or stir your liquid DIY products that include rosemary oil before using.

4. Ylang Ylang

The ylang ylang essential oil provides skin hydrating properties for this DIY face toner for mature skin. It not only smells wonderful and lifts your mood, but it can also naturally increase oil production in the skin. So, it rejuvenates your skin and your mind. Research indicates that this can in turn lower blood pressure and decrease elevated heart rates. So, the ylang ylang is another multi-winner addition to the DIY face toner for mature skin.

Vitamin E Oil

The vitamin E oil is an all-natural preservative. As an antioxidant, it can provide additional free radical fighting anti-aging skin care benefits. Therefore, it is another really good ingredient to use in the DIY face toner for mature skin.

diy face toner for mature skin

DIY FACE TONER FOR MATURE SKIN

Instructions:

  1. You can begin by filling your bottle with distilled water, witch hazel, and vitamin E oil.
  2. Now, you can add the ylang ylang and rosemary essential oil.
  3. Then place the cap back on the spray bottle (or whatever bottle you are using).
  4. And finally give the bottle a few gentle shakes.
  5. Now it is ready to use!

How to Use:

  1. Use the toner after cleaning your skin with the DIY face wash for mature skin and/or the DIY face scrub for mature skin.
  2. Close your eyes to spray the DIY toner for mature skin on your face.
  3. Let your face air dry.
  4. Alternatively, you can pour the toner on a cotton ball or a round cotton pad to rub the toner over your face to help remove any residual dirt, soap, or make up.

Conclusion

That is all for now! I hope you are enjoying the DIY recipes for mature skin! You may also be interested in the mature skin care routine. You can find many more DIY face products that you can make at home. Enjoy using the DIY face toner for mature skin.

Posted in DIY Face Care, DIY Face Serum

DIY Face Serum For Dry Skin

This is a lovely smelling moisturizing DIY face serum for dry skin. A serum nourishes both the skin surface and deep into the skin pores. In doing so, the serum (1) delivers soothing antibacterial, (2) increase natural oil production and (3) restore skin moisture and balance. With a really pleasant moisturizing formula, this DIY face serum for dry skin is a highlight in the dry skin collection.

The DIY face serum for dry skin is designed to be used after the DIY face wash for dry skin and the DIY face toner for dry skin. Since this formula is for dry skin, you definitely do not want to skip applying the DIY face serum for dry skin.

Ingredients

This serum is prepared with coconut oil, geranium, ylang ylang, and rose essential oil.

1. Coconut Oil

Coconut oil penetrates deep into the skin and increases blood flow. All by itself, it is a moisturizing antimicrobial. While penetrating the skin, it carries and delivers the other wonderful and beneficial properties that the geranium, ylang ylang, and rose essential oils provide. A fractionated liquid coconut oil is recommended to avoid dealing with a solid coconut oil. However, the solid refined (unscented) coconut oil can be used instead if it can be softened easily.

2. Geranium

Geranium essential oil has antibacterial and anti-inflammatory properties. With dry skin, minor skin tears and inflammation are very common. This is especially true in the dry frigidly cold winter months. Therefore, adding geranium to this DIY face serum for dry skin is used to get rid of bacteria and help soothe dry irritated skin.

3. Ylang Ylang

Ylang ylang essential oil is a very important ingredient used in this DIY face serum for dry skin. It is used to actually help stimulate natural oil production in the skin. Without enough oil production, the skin will be dry and dull looking. So, the ylang ylang contributes to this DIY face serum for dry skin helping you have a natural and healthy glow.

4. Rose

Rose essential oil can help to balance the moisture in the skin. Our skin needs change with the weather, hormones, and other factors. The rose oil can help the skin adapt to what it needs. Therefore, it too is a very important addition to this DIY face serum for dry skin recipe.

DIY Face Serum For Dry Skin

*A 2.7 ounce bottle will hold about 5 tablespoons. Therefore, this recipe will provide you with a little more than half a bottle of the DIY face serum for dry skin.

Instructions:

  1. Place the fractionated coconut oil, ylang ylang, geranium, and rose essential oil in a small clean container with a lid.
  2. Then cover the bottle with a secure lid and shake or stir gently.

How To Use:

  1. After using the DIY face wash for dry skin and the DIY toner for dry skin allow your face to air dry. If needed, gently pat your face dry with a soft, clean face towel.
  2. Then apply about a dime-sized amount of the DIY face serum for dry skin to your face.
  3. Use clean fingertips to gently rub the serum on your face.
  4. If needed, you can review how to properly apply face serum.

Conclusion

This is a really nice DIY face recipe for you to use on dry skin any time of year. With dry skin, the correct oils, creams, and moisturizers are a huge help. So, this DIY face serum for dry skin may be just what you are looking for!

Posted in DIY Face Care, DIY Face Wash

DIY Face Wash For Mature Skin

The DIY face wash for mature skin is a wonderful smelling formula created to address common concerns with maturing skin. The formula was created based on a health care approach in which three mature skin factors are considered and addressed. Therefore, this DIY face wash for mature skin is formulated with potent (1) moisturizers, (2) antioxidants, and (3) rejuvenators for the skin, mind, and body.

DIY Face Wash For Mature Skin

Free radicals are a normal part of metabolism. With accumulation, the free radicals cause our facial complexion to age. We may end up with dark circles under the eyes. Well, antioxidants do a wonderful job of combating free radicals that substract from our skin complexion and that can result in dark circles under the eyes. Maturing skin also tends to lackluster. Therefore, a second factor to address with mature skin is moisture and hydration. And lastly, the dreaded wrinkles are often a concern with maturing skin. The wrinkled skin is best remedied from the inside out.

Inside Out

With all that said, what we look like on the outside is sometimes a reflection of what is happening on the inside. Therefore, there are not enough face washes, face toners, face serums, face scrubs, or face packs in the world to counteract a poor diet. So, when using this DIY face wash for mature skin, you can also modify your diet to have much prettier looking mature skin in three simple ways.

First, if possible, reduce your sugar intake. You can take a 30-Day Low Carb Diet Challenge to assist with this. Second, make sure your protein intake is adequate. Eating healthy proteins with healthy fats like salmon are ideal. Third, take a daily vitamin c and collagen supplement.

Collagen is literally like human glue that holds the body together. Among numerous other things, it can help reduce the appearance of wrinkles. However, collagen can only carry out its role in the presence of Vitamin C. Therefore, to maximize the effects of its use, it is best to take the collagen supplement and Vitamin C at the same time. When done consistently, (1) a decreased sugar intake, (2) an increased protein intake, and (3) a collagen vitamin c supplemented diet can make a very noticeable improvement in the overall appearance of the skin.

You can also learn more about the health benefits of collagen and the health benefits of vitamin C or peruse a variety of collagen supplement options. Or, if you are wondering, you can find the answer to What Is Collagen, And What Does It Do? So, with all that said, let’s get on with the DIY face wash for mature skin.

Ingredients

A good DIY face wash for mature skin needs to be moisturizing, antioxidant-rich, and rejuvenating to the skin. So, that is exactly what this DIY face wash recipe provides for the mature skin.

1. Moisturizing Soap

An olive oil soap base is an excellent choice for this DIY face wash for mature skin. Olive oil soap is extra mild soap with antioxidant and moisturizing properties. It can also help to relieve mild inflammation in the skin. Therefore, this is a very good option for the DIY face wash for mature skin.

2. Antioxidant-Rich

Rosemary essential oil is incorporated into the DIY face wash for mature skin primarily because it has potent antioxidant properties that combat free radicals. However, it has many other benefits for mature skin. Rosemary essential oil is also a rejuvenating oil that increases blood flow which makes us more attentive, alert, and energetic. In fact, research shows that it can help improve brain function in the young and the old alike. This oil is also a pain reliever and a stress reliever – both ailments that can cause us to age faster. Therefore, rosemary essential oil is an excellent addition to this DIY face wash for mature skin.

3. Rejuvenating

The ylang ylang essential oil is another excellent choice for this DIY face wash for mature skin. This oil can help rejuvenate mature skin by naturally increasing oil production in the skin. It is also a natural mood enhancer that alleviates anxiety. This in turn can thereby lower blood pressure and decrease a elevated heart rate. When we feel good, we typically start to look good as well. So, this oil is a multi-winner in this DIY face wash for mature skin.

DIY FACE WASH FOR MATURE SKIN

DIY FACE WASH FOR MATURE SKIN

Instructions:

  1. Begin by diluting the olive oil soap base to the thickness you prefer.
  2. Then, add the soap base, ylang ylang and rosemary essential oils to the bottle being used.
  3. Next, place the cap on the bottle. Now you can gently turn the bottle upside down and right side up until the DIY face wash for mature skin has been mixed well.

How To Use:

  1. Wet your face with warm water.
  2. Then you can use your clean fingers to apply a nickel-sized amount of the DIY face wash for mature skin on your face.
  3. Use your fingers to gently clean your face using a circular motion.
  4. Now you can rinse the used soap from your face with warm water. Then pat your face dry with a soft cloth.
  5. Finally, apply the DIY face toner for mature skin followed by the DIY face serum for mature skin.

Conclusion

This recipe has an uplifting aroma that you may really enjoy! You can find even more DIY face recipes or another DIY Face Wash. Follow us on Instagram and Pinterest. Like, share, and subscribe! You can also review the mature skin care routine for more details. I hope you enjoy making and using this lovely uplifting DIY face wash for mature skin.

Sources:

Posted in DIY Face Care, DIY Face Scrub

DIY Face Scrub For Dry Skin

The DIY face scrub for dry skin is a simple, but effective skin care solution. A face scrub is a type of skin exfoliator. There are both physical and chemical skin exfoliators that can be used on the face. However, as the name suggests, this DIY face scrub for dry skin is a type physical exfoliator.

diy face scrub for dry skin

Why Exfoliate?

Our skin naturally renews itself from within. As new skin cells form below the skin’s surface, it pushes the old dead skin cells to the surface. This process can clog the pores and cause your face to look dry and dull. The DIY face scrub for dry skin (1) removes dead skin cells and (2) unclog pores while delivering nourishing skin care benefits to the skin.

While we can pick up dust and dirt that is floating around in the air, most of the dry skin that we experience is a result of the skin naturally renewing itself. The DIY face scrub for dry skin can help remove the dead skin cells and thereby allow your face to have a healthy glow.

As the face scrub removes dead skin cells from the surface of your skin, it allows other face treatments to be more beneficial. For example, when your pores are unclogged, it allows the DIY face serum for dry skin to be better absorbed into the skin. And as a result, it can deliver its skin nourishing properties for dry skin types.

Ingredients

The ingredients used to make this simple DIY face scrub for dry skin includes (1) a soap solution and (2) an exfoliating agent.

DIY FACE SCRUB FOR DRY SKIN

1. The Soap

The soap solution used in this DIY face scrub for dry skin is the DIY face wash for dry skin. Therefore, your face will get the same skin nourishing benefits along with a gentle exfoliation.

DIY FACE SCRUB FOR DRY SKIN

2. The Exfoliator

A good exfoliator for a face scrub is small, gentle, and perhaps dissolves easily. It should be small enough to easily apply to your face. And, it needs to be gentle so as to avoid tearing the delicate skin we have on our face. When it is easy to dissolve, it minimizes the risk of us over exfoliating because it dissolves as it is being used. Therefore, a simple fine white sugar is the exfoliator used in this DIY face scrub for dry skin. This is an ideal exfoliator for the face because it has a fine texture and dissolves easily in water.

diy face scrub for dry skin

DIY Face Scrub Recipe:

Instructions:

  1. Place the fine white sugar in a small bowl.
  2. The add the soap solution.
  3. Next, stir the mixture with a spoon or with your fingers before use.

How To Use:

  1. Wet your face with warm water to start opening your pores.
  2. Then apply the DIY face scrub for dry skin on your face starting with your chin area first.
  3. Then gently rub the scrub on your face in an upward motion using small circular motions. Then, after gently scrubbing the chin and cheeks well, continue applying the scrub over your nose and forehead. Avoid the soft skin tissue under the eyes.
  4. Now you can rinse your face with warm water after gently scrubbing your face for 1-2 minutes.
  5. Pat your face dry with a soft cloth.
  6. Finally apply the DIY toner for dry skin and DIY face serum for dry skin.